I’ve had a rather bumpy start to the year – I managed to put my ‘back outta whack’ on New Years Eve… not doing anything interesting I’m sorry to report. I was actually typing a blog post at 7am, drinking a coffee, had a stretch… and crack. Ouch.
Anyways, after quite a bit of pain, afternoon sleeps, lots of physio visits and anti-inflammatories, I am on the mend and almost back to ‘normal’.
So I tackled some smaller projects while I was recovering. HATS!
When I started doing some posts for Stitch 56, one of the things that interested me was doing some more sewing for my daughters. They do appreciate it enormously… so I started at the top – literally with their noggins… and chose Kids Hats by Melbourne based designer Nicole Mallalieu of You Sew Girl to road test.
I was a little nervous – as I always am when I am attempting to sew something completely new and unfamiliar. I didn’t need to be. This pattern makes hatmaking a breeze. No sooner than you finish one, than you want to make another!
The pattern has three hat sizes for head sizes ranging from 48cm through to 57cm. The pattern pieces are not nested which meant I could just cut out each size and then trace them with the markings onto my fabric. I’ve been making so many hats I think I will trace these onto template plastic for a more durable pattern.
The pattern contains detailed instructions, photographs and variations. There is lots of learn about how interfacing behaves, what role bias plays and more. I found it an interesting project!
However the best thing? These were just fabulous fun to make! It takes me about three hours to make a hat now – I prefer to hand stitch my brim trim and crown lining into place so it takes longer than it might for others.

Hats for all! Even the crazy children!
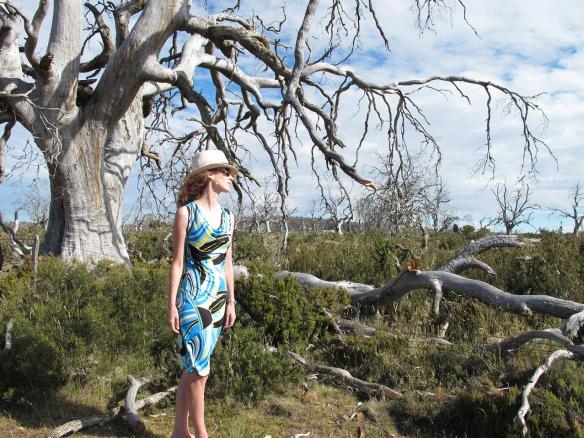
My children are aged 8 and 10 and I made the large for both of them.
I made the first hat from denim from the op shop. The lining and trim was made from a retro floral sheet scrap a friend had given me. I made a fabric flower and we finished it with a crochet-covered button from the ‘random’ button tin. She’s been wearing it ever since!

The denim edition
My second daughter then required a hat immediately, pronto, ASAP! This one is made from cotton poplin and lined/trimmed with red rayon. Unfortunately she chose a black background fabric so I am making her another in a lighter shade – better for the really sunny days! However this is still as cute as a button – or rather a strawberry!

And one for the crazy kid…
Finally I have made a third for my daughter’s friend who looked most envious as I made Zoe’s. It’s posted over at Stitch 56 – check it out.
I highly recommend this project as a crowd pleaser AND stash scrap buster. It’s a winner!
There will be many many more hats in my sewing future!
Finally, just a few little tips that I picked up as I made the hats…
1. Sewing the Curves
I found sewing the curves was very easy if I curled the fabric up and away from the front of the presser foot as I sewed.
Holding the fabric upwards from the presser foot as I sewed around the curves.
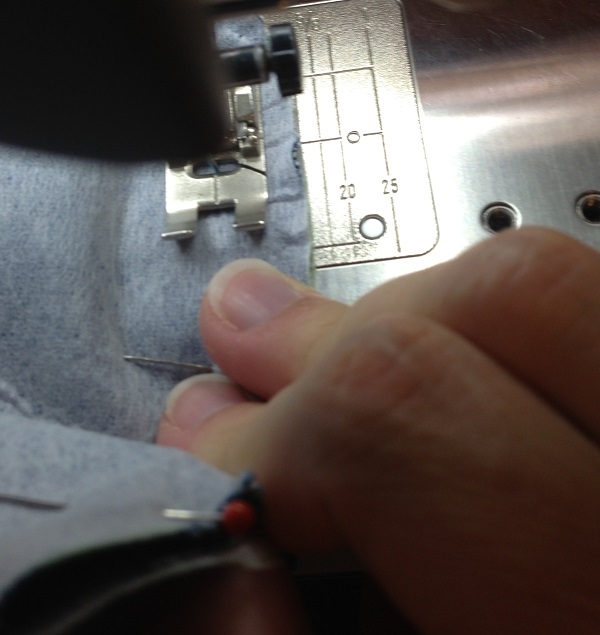
2. Think about your pinning
Position your pins so they are easy to remove as you sew (see above) and they don’t scratch you as you sew!

I pinned the top to the crown with the pins facing inwards – a lot less ouchies when sewing.
3. Achieving even brim stitching
All my hats have top-stitched brims, I think it makes for a more sturdy hat. The lines are evenly spaced at 2cm intervals. The easiest way to achieve this is to use a seam gauge and place a post-it note on the arm of your machine. Then watch the edge of your hat against the post-it note (rather than the presser foot). Perfect every time!
I also increased my stitch length slightly.
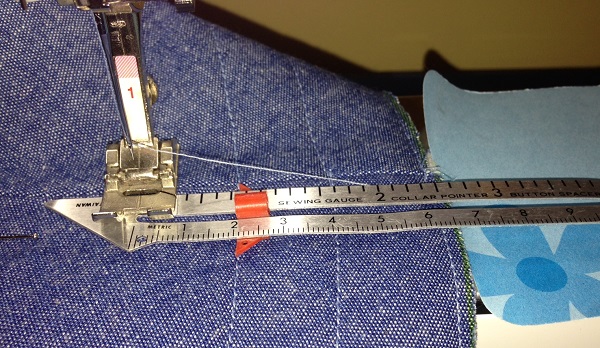
Careful measuring and sewing resulted in perfect top stitching every time!
There are lots more tips in the pattern – and I can’t stay here and type as I have hats to make… and if you are interested in adding hats to your sewing stash, check out Nicole’s You Sew Girl blog which contains lots of interesting information. You can obtain this pattern from Stitch 56… where there are also a bunch of gorgeous purse patterns… hmmmm tempting….
I’ve just purchased the Fedora Pattern by You Sew Girl… I think I’m addicted! This one is for ME though!
Pattern: Kids Hats by You Sew Girl, provided to me by Stitch 56
Fabric: denim, popin, rayon, scraps and more from my fabric pile!
AND THE WINNER OF THE LOLITA PATTERNS GUNMETAL GIVEWAY
by random number generator is….
RAVENNA
who hasn’t left her email address, so please send me an email Ravenna at sewbusylizzy (at) gmail (dot) com and I will organise the send the pattern out to you. If I don’t hear from Ravenna by Wednesday 15 January I will have a re-draw.

Lolita Gunmetal – the sweet version
Thank you everyone for your kind comments and interest in winning the pattern.
If you didn’t win but still want your own version on Gunmetal – you can buy the pattern as a PDF, paper pattern – and even the D-rings at Lolita Patterns.