Papercut Patterns Celestia Dress

aka the Floral Explosion Holiday Dress.

Papercut Celestia Dress – in cotton voile

I don’t often toile my first-time pattern attempts. I tend to cross my fingers, send up a little prayer and hope for the best.

However when a first-time pattern calls for over 4 metres of fabric and the final fabric is absolutely scrumdiddlyumptious, I’m reluctant to risk destroying it in a risky game of sewing roulette.

Papercut Celestia Dress in cotton voile: a toile

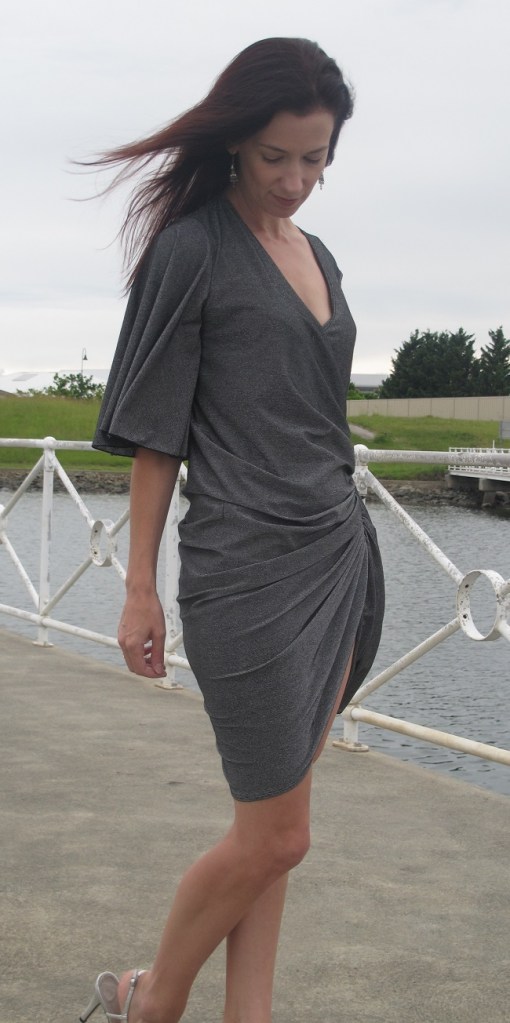
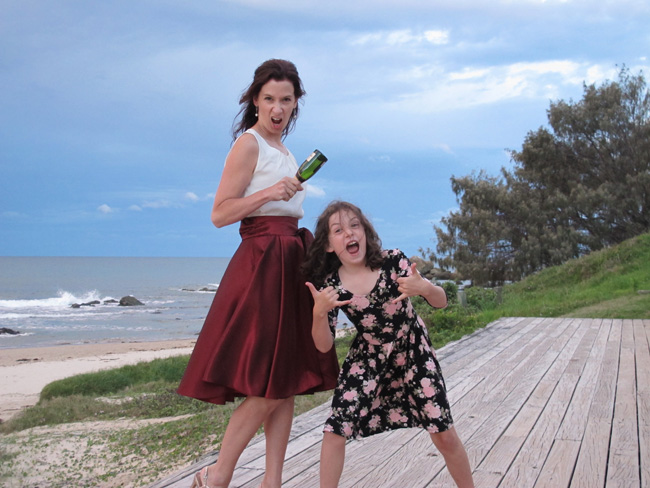
So here we are in my toile of the Papercut Patterns Celestia Dress. 4m+ of some of the most extravagantly floral fabric I’ve worn! This fabric was an impulse purchase from the Spotlight bargain table for less than $4 a metre. I wasn’t quite sure why I bought it at the time, or why I thought 5m was a good idea and I’ve nearly destashed it several times… however here we are…

The Pattern

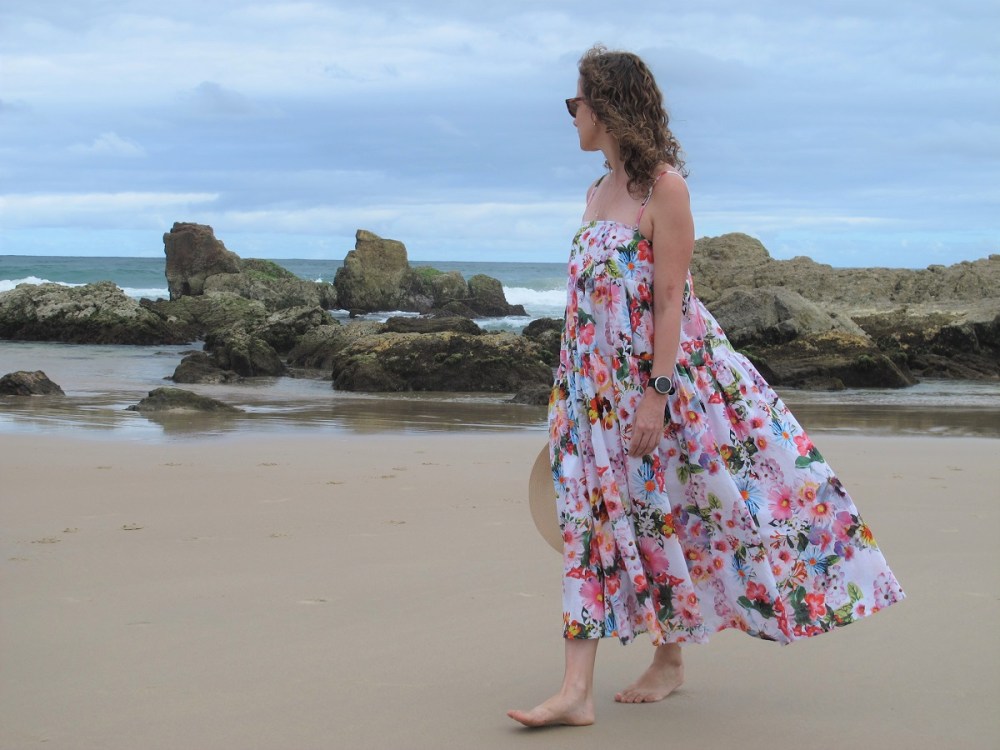
It a very straight forward sew. The bodice is very cropped and more of a ‘ledge’ for two tiers of fabric to cascade from. There are no bust darts or shaping.

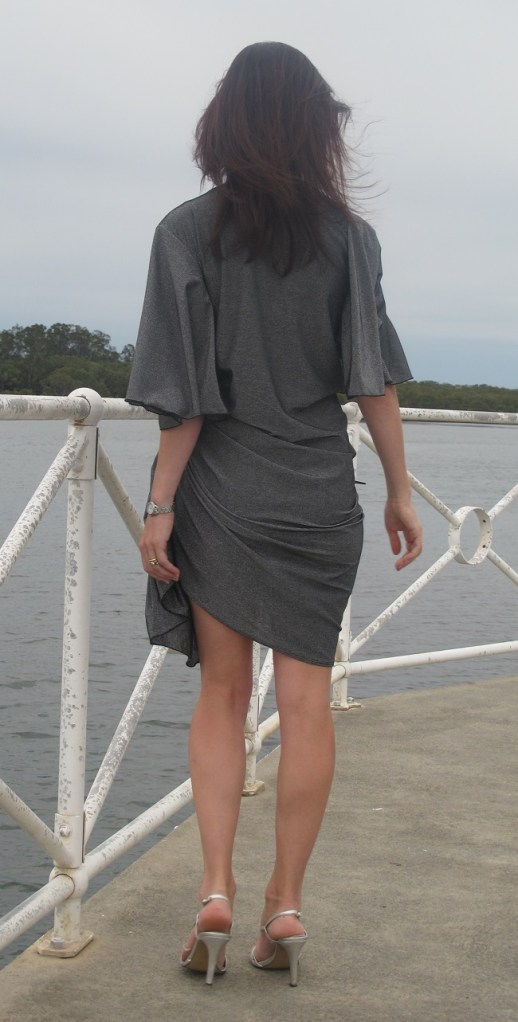
I think the straps are too far set towards the sides. I’d bring them in approximately 10mm or slightly less next time. for some reason I thought I’d experiment with doubling the straps. While it’s got potential, the complex back tie arrangements needs more visual detail is not warranted.

Toile adjustment

The back ties…. I was drawn to this pattern because I loved the back view – however it’s my biggest gripe.

Fabric recommendations are mid-weight woven (cotton, rayon, linen and blends).

Papercut Celestia Dress – those back straps… not my friend. Also please ignore my bra back – I’ll sack the stylist… however I don’t have one to sack! And yes, there are pockets.

The straps definitely fell into a ‘call a friend’ category to adjust, pull in the back bodice to fit and tie the front straps evenly. I ended up fiddling and adjusting the straps myself before trying it on, multiple times. The back loops are one fabric strap, sewn into a casing at the top edge of the back bodice, with the ends pulled out at openings at either end of the casing to form loops. While I liked the overall effect, I found it very fiddly to put on to wear, and if I pre-organised the straps to fit, I found it tricky to get off over my shoulders. So much so, I popped the stitching holding the back strap loops in within the casing.

This could simply be an issue with my fabric having less ‘slip’ than other possible choices, the back loop didn’t want to easily pull through to gather up the back section between the loops and fit the bodice nicely to my upper bust.

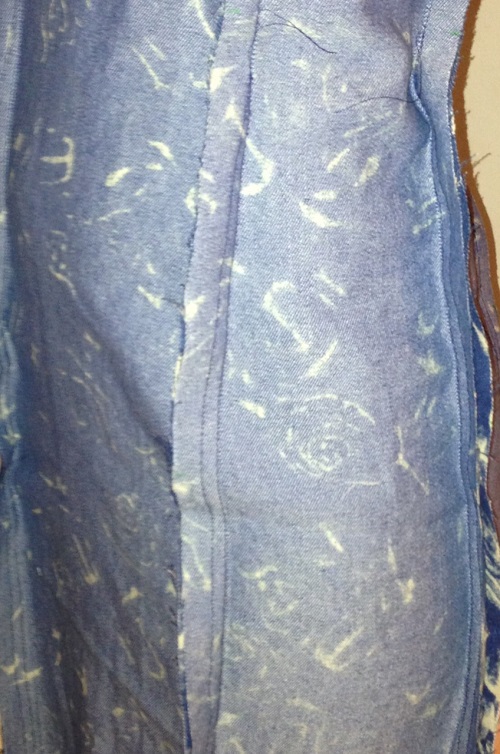
To tackle this issue, I decided to secure the back loops at a set length and secured them with several machine stitches. I threaded a piece of elastic through the casing and pulled it up to my desired length to fit, and then secured the elastic ends within the casing with several rows of machine stitching.

I apologise for my lack of photos or illustrations to assist here – my phone app is not playing nice and allowing me to upload any more images. Next Celestia blog post, I’ll provide some more.

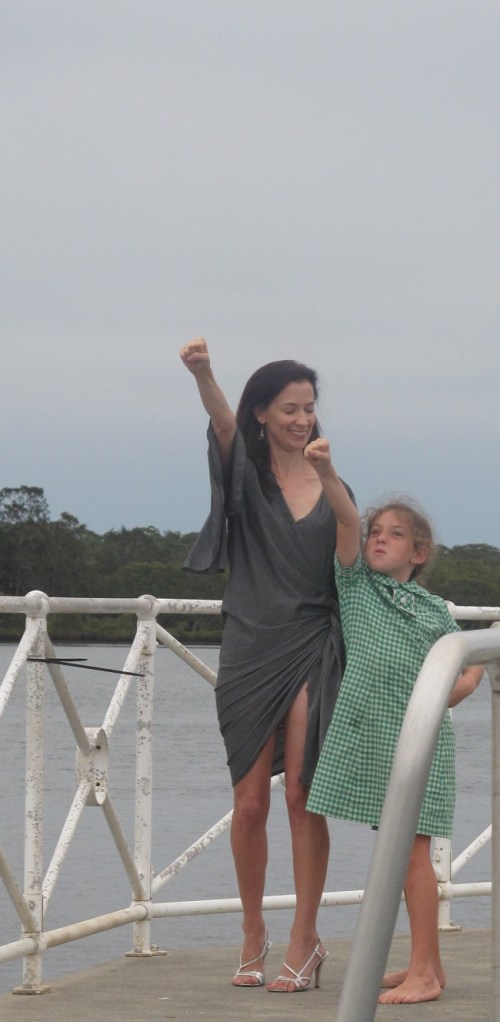
This adjustment has meant the design has lost its flexibility in determining fit for each wear, and potentially the ‘relaxed boho’ vibe of a looser back fit – however it pulls the bodice in firmly while still providing comfort. It’s also easier to put on by myself and easier to take off with requiring endless fiddling with the straps for every wear (tying a bow, while pulling up the back straps evenly with your arms twisted behind your back and between your shoulder blades is quite a challenge! I salute those who easily can!).

Papercut Celestia Dress – surprised at how much I like this very floral dress. Not my usual style but a change is always good!

Final thoughts…

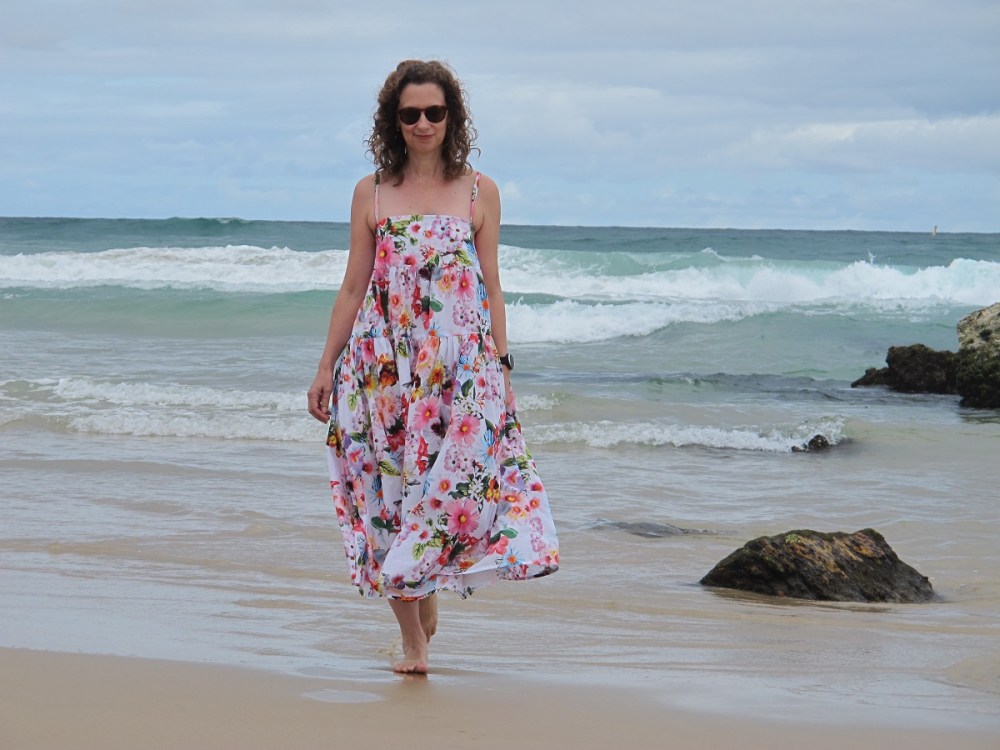
I think I’ll risk my scrumdiddlyumptious fabric… I love the volume in this dress – and how it’s hanging from a cropped, fitted bodice. It’s got a lovely airy, careless, artless vibe when you are wearing it.

Pattern: Papercut Patterns Celestia Dress – bust sizes 76cm – 154cm (30 inches – 60 inches)

Drape Drape 3: No.12 Draped Wrap ‘Dress’

also known as ‘A Wardrobe Malfunction Waiting To Happen’

After the modest, sweet delight of Sewaholic maxi skirt Gabriola, I appear to have done a massive u-turn and created something that could barely be described as a ‘dress’. Sorry about that! The Drape Drape journey continues.

I’ve come to think of this make as the ‘wardrobe malfunction waiting to happen’. Or perhaps a ‘lounge dress’ best worn in the safety of my own home, having late night drinks on the lounge with ELH!

Drape Drape 3 No 12. Draped Wrap Dress

wrapped side view

Funnily enough my draped singlet dress was described by Drape Drape 2 as a ‘tunic’ and I easily wear it as a dress (in fact I now have three of them – sorry not all photographed!)… whereas this ‘creation’ is described as a ‘dress’ but… it covers far less than the singlet dress!

This number is No.12 from Drape Drape 3. And this is how it’s showcased in a book – yes more hamburger-hungry models with poor posture. Then again… maybe she’s stooped over trying to hide her legs… let’s give her the benefit of the doubt!

drape drape 3 No 12

The ‘dress’ as illustrated in Drape Drape 3

This ‘not-dress’ was quite easy to put together. Much, much easier than the deep cowl-necked number. Unfortunately we have been enduring some rain (yes, not always sunny here) and the poor light really doesn’t show off the black/silver beauty of this fabric from Tessuti – purchased on my recent trip to the Sydney Bloggers meet-up organised by Made By Melanie.

Drape Drape 3 No 12. Draped Wrap Dress

The back view – somewhat more respectable.

I do adore the back of the dress and the lovely lazy draping that sweeps across my back at an angle. That’s created by gathering up one side of the skirt and sewing it to the bodice side… yes the bodice side. That’s what creates that rather ‘raunchy’ leg reveal – there’s just no fabric on one side below waist level.

I actually pinned the draped section over a little to cover more of my leg for the pictures. Yes, the draped bow helps cover my leg… almost up to my HIP! *faints*

Drape Drape 3 No 12. Draped Wrap Dress

ummmm, I think I just heard my mother faint.

The draped ‘bow’ is created by making three pleats and then gathering the whole section up, including the pleats, then sewing it across the dress and creating the ‘wrap’. It does create a lovely draped section… perhaps it just needs to be longer… much, much longer…

Drape Drape 3 No 12. Draped Wrap Dress

at least the ‘draped bow’ is covering something!

I did use my Janome coverstitch machine on the neckline and skirt hem – I still need to practice more with the beast. I did hem the ‘draped bow’ but it made it seem less fluid. So I unpicked it – massive job. Then used my overlocker to roll hem the ‘bow’ section – and I also used the overlocker rolled hem function to finish the sleeve hems. This gave the edge of the bow & sleeves a much lighter finish, slightly fluted lettuce edge hem – much better for this make that needs to retain its softness to create the lovely draped lines.

Drape Drape 3 No 12. Draped Wrap Dress

Draped side view – love this view. I feel almost respectable

The sleeves are just sewn into armhole and the underarm seam is left free – so they feel ethereal wings to wear.

I find this design quite interesting. It’s got an incredibly immodest leg line… the neckline is not much better… then these enormously billowing sleeves – it’s a fascinating mix and I do rather like it. But how to wear it?? I slapped on my old trusty black skinny jeans when I got home and it looks OK. Sorry about the foggy lens… I think that was a raindrop!

I have had some people suggest I should wear a slip under it – but I disagree. A slip would change how the dress moves and I think spoil the lines of the design – I think it’s better as a tunic.

Drape Drape 3: No. 12. Draped Wrap Dress

as a tunic… now that’s better!

Pattern: No.12 from Drape Drape 3 published by Laurence King
Fabric: black/silver knit from Tessuti, Surrey Hills store, Sydney

This must qualify for the Sew Sexy Sewalong! Yes?

and an out-take with my crazy little cracker – Miss (just-turned) 9. She explaining how I could pose better as a superhero. Doh! Why didn’t I think of that!

Drape Drape 3 No 12. Draped Wrap Dress

Superheroes!


Top 5 Inspirations

Top 5 of 2013

Top 5 of 2013

My writing at the moment is a little brief. I managed to throw my spine out of alignment (merely by stretching after my morning coffee!) on New Year’s Eve.

Don’t fret I’m much better, still stiff and sore but on the road to recovery.

Top Inspirations…

I’ve changed a lot in the past year of sewing.

I’m sewing more to the beat of my own drum. I know what I like, what suits me and my lifestyle. More and more I just sew ideas that pop into my head. I am forever browsing the internet, watching people in the street, examining garments in-store, I love clothes in ‘action’.

I guess my top Inspirations would be.. (sorry just four today – I clearly can’t count this year)

Sewing blogs & twitter
Without a doubt seeing what everyone is creating and how they are doing it is a Number 1 inspiration. Keep sewing & blogging people!
I’ve recently discovered Beaute J-adore and Jolies Bobines. Fabulous sites with great makes, photography and styling – check them out.
I love twitter – love it. I get lots of ideas, inspirations and solutions from my twitter friends – thank you – love you all!

Patterns
I love new pattern releases – whether it’s the Big 4 or indies. I find all new patterns thought-provoking and inspiring. These days I like to look beyond the styling and create my own version. Recent examples of this are my Late Lunch Tunic (which has been worn a lot!) and my Vogue 1351 for Minerva Fabrics. I’m currently working on my Lolita Patterns Gunmetal and it’s really sweet and very different in feel to the other Gunmetals floating around out there!

Fabric
I’m very driven by my fabric choices. My husband said to me one day – “it’s a peculiar gift – you walk past a bolt of fabric, pat it and say… ‘wow that would make a perfect halterneck dress/shirt/trousers/jacket etc’… I just see a bolt of fabric – you see what it could become.”
This is probably why I struggle with sewalongs. I can’t make something unless I can find the right fabric for a pattern. I’m a little obsessive on that score.
So fabric stores and online shops I can spend hours in, dreaming about my next make…

‘Not’ shopping
I love to wander around shops and browse online. I very rarely buy these days – instead I’m forever snapping images on my iPhone and filing away ideas for another sewing day.
I’m very driven by my lifestyle. Fortunately I have a need for casual wear, corporate wear and cocktail dresses in my life so I have diverse sewing projects to tackle. I like to make things I will actually wear. It’s fun to sew things for the sheer challenge – it’s more fun to sew things that you wear frequently!

Still got my 2014 Goals to go – I’ve been thinking hard about this one!

The new girl in town, Georgia dress from By Hand London

When Elisalex of By Hand London contacted me and asked if I could like to try their new pattern – I think nearly jumped through the computer screen with excitement.

And here she is…

GEORGIA! As or I call this version… My Georgy Girl.

The new kid in town - Georgia from By Hand London

The new kid in town – Georgia from By Hand London

Georgia Dress, the back view

Georgia Dress, the back view

I’ve got about four Georgia dresses buzzing about in my head (she is as demanding as Anna was, I have warned you). However since I have been dying to make a fitted denim dress – this just seemed to be the perfect opportunity!

This is stretch cotton denim from Spotlight. An amazing bargain table find at $4 a metre. It didn’t look that great on the bolt but I love it made up. It’s perfect. Soft blue, faded cream, irregular print. Perfection.

This is fabric so soft and stretchy, it’s like wearing PJs. Seriously. Yes, even as a fitted dress.

CONSTRUCTION

SKIRT

The skirt has six panels. I was a little nervous about the skirt fitting over my junk trunk (I know, typical girl) so I graded the skirt from the bodice downwards out to a size 10 – better to have more fabric in my seams than none I figured!

I then machine basted the skirt together (with the longest stitch) and tried on the skirt inside out. I found this the easiest way to see where I need to grade the curves in and back out to achieve a good fit.

My inside-out approach to fitting the Georgia Dress

My inside-out approach to fitting the Georgia Dress

I basted the new seams (back to size 6 anyway you idiot Lizzy) and when I was happy, I machined the final seams, removed the basting, then used my overlocker/serger to trim/neaten the seams.

I also pegged the skirt in just a little at the hemline for a more streamlined fit.

Bodice

I found the bodice to be an excellent fit. You will notice that I gathered the centre of my bodice. This is simply because my denim was stretchier than I thought and the neckline stretched out a little and was gaping along the edge. I considered unpicking the entire bodice and then remembered how the gathering stitches had changed the fit of my Hot Mess Birthday Dress bodice. The denim was a little heavy for gathering stitches so I did three small pleats instead. Seems to have worked – although probably increased the va-va-voom of the dress which always freaks me out a little.

If you are using a fabric with some stretch. I would advise stay-stitching or lightly interfacing your bodice shell fabric or at least the seam line to avoid the neckline stretching.

Georgia: the bodice lining, quilting cotton & boning.

Georgia: the bodice lining, quilting cotton & boning.

I also stitched lightweight polyester boning to the seam allowances of the lining. I just use the Rigiflex (?) boning which you can machine stitch through, it’s quite flexible and very easy to apply. It doesn’t make the dress uncomfortable, I actually think it makes dresses with a structured bodice easier to wear as they just sit and don’t lose their structure with wear.

I understitched the lining. The instructions don’t tell you to do this but it improves the finish of the dress.

Zipper

This dress has an invisible zipper. Georgia’s zipper insertion is per ‘normal’ and then the instructions have you handstitch the lining to the zipper and along the bodice lower edge.

I machined the lining to the zipper using the Sewaholic Cambie method of attaching a lining to a zipper. It’s neater and quicker. Just sayin’.

It’s easy to do – once you have sewn in the zipper, just turn the lining back so the right sides of the bodice shell and lining are facing. Line the lower seam allowance of the lining back (in line with the bodice seam. Pin along the zip. Then using your normal zipper foot sew down alongside the zipper teeth (on the side closest to the seam edge). Turn the lining back out and you have attached the lining. So simple.

Attaching the lining to the zipper by machine
Attaching the lining to the zipper by machine.

So there you have it – there’s a new girl in town… and I think she’s bringing her friends… stay tuned.

The ELH’s reaction was just ‘Wow’ when I walked down the stairs wearing this. I think that’s good, yes?

Georgia Dress

Later in the evening, a little crumpled… we have had a lot of rain this week but the sun came out on Sunday afternoon – I think Georgia wanted to meet you…

OTHER SEWBUSYLIZZY NEWS…

Madly stitching the Thread Theory Goldstream Peacoat.

Ordering some fabric for my Lolita Patterns Gunmetal top – and there will be a pattern giveaway when I blog it. I have this idea in my head for this top/dress – and although I’ve tried to make do with what’s available in town, I just can’t – stretch fabric is harder to find than you might think in my town. Online ordering it must be! I should have blogged this on its launch – but I’ve had all kinds of challenges and things going on in my life… sometimes you just can’t do everything… boo.

Pattern: Georgia Dress, By Hand London. Sent to me by the By Hand London girls (mwah – love you as always. And yes I stalked the postman ’til it arrived – I’m not ashamed LOL).  Available in Australia at:-

Fabric: Cotton stretch denim from Spotlight, Australia.

Also See: The amazing version by Roisin of Dolly Clackett | Sally Bee makes gorgeous blocked plaid Georgia

A VERY Merry Christmas Skirt! Vogue 8882 – Minerva Blogger Network

Hooray! I am in a state of shock – while I did not manage to punch out a birthday or Christmas make in 2012 – this year I have done both!

Last week it was the Hot Mess Birthday dress – a rather complicated but very pretty and enormously satisfying make.

This week I have my first Minerva Bloggers’ Network project to share.

A Very Merry Christmas Skirt

With my Minerva makes I wanted to make things that I felt anyone (any age, any shape) could wear, sew and feel fabulous in. I also wanted the kit to have pretty much everything they needed to start sewing, or at least most of it… the fabric, pattern and thread. So once you have pounced on the postman, you can rip open the envelope and get sewing. You might need the odd notion or some interfacing – but many stitchers do have these things in ‘the stash’.

I’ve always wanted a ‘Christmas’ skirt or dress but never quite got around to making one (and I have rather a lot of party clothes anyway…). The festive season hits and life is a merry-go-round of parties, concerts, holidays, meals, drinks, family and friends. Life gets busy – no time for sewing…

So make that Christmas skirt now! I’ve chosen a project that will minimise your time at the sewing machine and maximise your time at the party.

I know. I’m good to you 🙂

Vogue 8882

Vogue 8882

I’ve been eyeing off this skirt since Vogue released it – even though big skirts aren’t really my gig I just fell in love with it. When I spied this this lovely shot WINE taffeta on the Minerva site, I felt it was a match made in heaven.

The taffeta transforms in different lights…

Vogue 8882 as the sun grows down

Vogue 8882 as the sun grows down

The colour transforms when the setting sun hits it!

The colour transforms when the setting sun hits it! hmmmm, I have that bronzed Aussie look going on as we approach summer…

Bows and frills scare me BUT I can’t imagine the skirt without that monstrous sash and bow. It’s perfection…

As my Christmas Day is never ‘white’ except for the sand on the beach, I paired by skirt with a simple cream tank top and rose gold strappy heels. I think this skirt could easily be translated into a wintery wear – the claret tone looks gorgeous with black (yes, I experimented for you too).

You can read lots more over on the Minerva site… so go over there for more pictures and how-to.

My major changes were…

  • Invisible zipper instead of standard.
  • I did a roll hem. My legs would look like toothpicks coming out of a even oomph-ier (yes, that’s a technical term) skirt.. If you like lotsa ‘oomph’ I’m guessing you have some petticoats stashed for this purpose!
  • Taffeta is not a fan of iron-on interfacing – use sew-in. Listen to SewBossyLizzy and weep no more.

So let’s twirl together this festive season… I know you want to…

This skirt is loads of fun to wear… it even rustles! I’m not a gentled-footed creature. I sound like a mini herd of elephants stampeding through the African grasslands but I’m ok with that.

Giddy with Happy Happy Joy Joy.

…giddy with Happy Happy Joy Joy… and I’d just like to let you know that it takes a lot of concentration to not wedge a stiletto heel into timber decking! Check out the Minerva site where I’m spinnin’ like a whirlgig.

Miss 8 teaches me to party with attitude!

Miss 8 teaches me to party with attitude!

Pattern: Vogue 8882
Fabric: Wine shot taffeta.
Kit available from Minerva Fabrics – you know you want to – I’ve done all the shopping and pattern testing for you! Sew one and party on (perhaps Miss 8 should do a blog post about party style – she’s got it down to a fine art)

If you are concerned about shipping costs… I purchased 4m of this blue fabric from Minerva (apparently I’m a Shimmer Twill piglet – I need MOAH) and the shipping was just 10 pounds and arrived in no time at all. Love.