PATTERN PARCEL #6

I was supposed to be on the Pattern Parcel #6 tour. I really wanted to be. I think it’s a great parcel – especially if you like knits.

Several things popped up unexpectedly in my life. Manic work schedules exploding (my busiest time of the year with additional tasks being added), husband away fishing, youngest daughter in hospital (thought that was going to be in January – fret not – she is fine) and the list goes on and one and on. Like for anyone else, sometimes ‘life happens’.

This might also explain why I might not have responded to some emails & blogs comments. Sorry, I will. Soon.

So I decided to put my money where my mouth is. I actually bought Pattern Parcel – yes I had the patterns but I like to be a contributor not just an enabler/encourager. I spend plenty of money on sewing, far beyond what I receive. It’s my hobby and indulgence – and I also like to support the industry. Not just indies, but the Big 4, fabric shops and so on. It’s all part of a bigger picture. If I unexpectedly couldn’t support it as a feature blogger, I’m more than happy to buy the patterns. If you saw my pattern ‘library’ you would be greatly amused – it is HUGE!
Pattern Parcel No.6So there is just hours left – Pattern Parcel is out there and waiting for you if you are fond of knits, skirts, dresses, tunics, pants or cardigans, this one might be just for you.

Drop Waist: Take 2, Papercut Saiph inspired Burda 7056

So while the jury is out on SBL vs the drop-waist look. I decided to try another ‘Saiph inspired’ make. Yes, another drop waist and a circle skirt.

I wanted to try out another drop-waisted look, this time with a more fitted bodice.

So I turned to my bulging pattern & fabric stash to see what might be a contender.

Burda 7056

Burda 7056

I chose Burda 7056, described as “No-frill dresses for the confident woman, being the focus. All slightly flared, fitted at the back waist, shoulders left exposed“. I liked the more fitted but slightly a-line shape, with fitting provided by bust darts and back fish-eye darts. I added this pattern to the stash quite some time ago, I love the maxi version, and I also love the combination of high neckline and cut-away shoulders. There are not too many blogged versions out there – except for the lovely new-to-me blog bernie and i who has made it several times!

The fabric is a cotton sateen from a Spotlight bargain table for a princely $3 a metre. I adore the vivid blue & white. The large regular pattern is fun but not easy to sew with as you will see later!

Here’s what happened…

Burda 7056 with Saiph-inspired drop-waist and skirt modification.

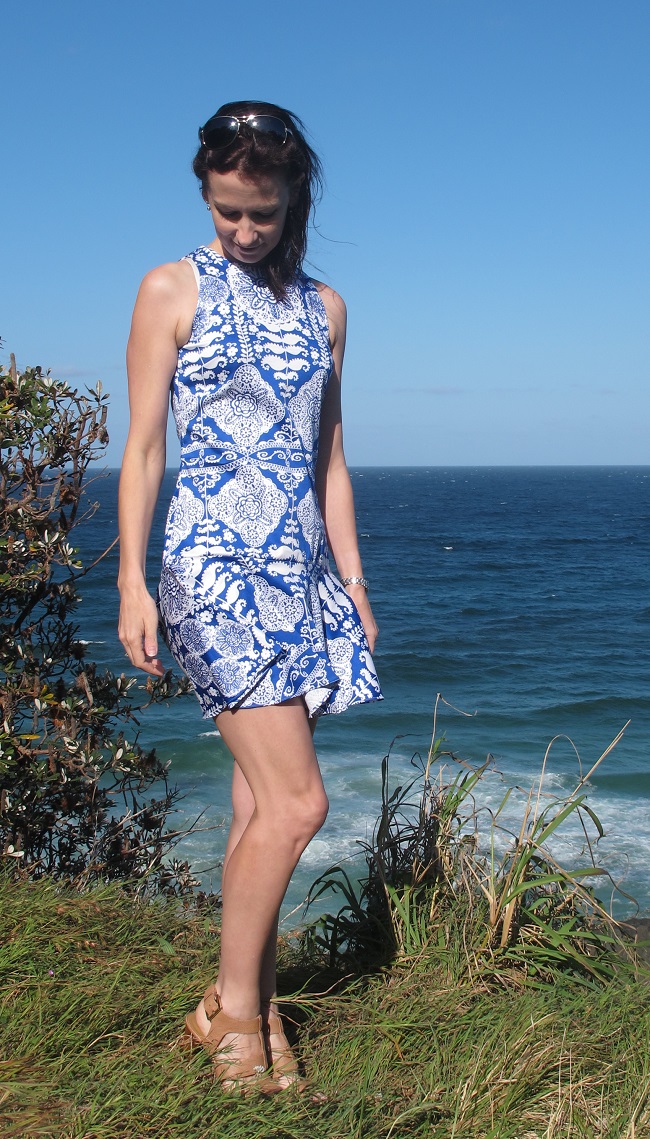
Burda 7056 with Saiph-inspired drop-waist and skirt modification. It was blowing a gale on this day we had to find a headland out of the wind (almost impossible to get out of the wind anywhere some days – so the dress looks slightly distorted in this picture and my bra strap has popped out – that’s life. And yes, it’s TOO SHORT! My waist is at the ‘ellipses’ travelling horizontally around the dress.

I cut the dress pattern off at about ‘Saiph’ bodice length. I sewed the bodice together, attaching the facings, which are great and don’t flip out at all due to the style of the dress, and put in the zip. The zip is a long centre back invisible zip.

To draft the circle skirt piece, I measured the finished bodice circumference. I then simply googled ‘circle calculator circumference, find radius’. Low and behold a little box popped up and I was away. This provided the radius & I used my daughter’s school compass to draft the dropped waistline of the circle skirt piece.

I simply pulled out the Saiph skirt pattern piece and used that as my guide for the outer hemline. I know, string, fishing line, makeshift compass, la la la – the pattern piece was there and a circle is a circle is a circle.

Burda 7056 with Saiph-inspired drop-waist and skirt modification.

Burda 7056 with Saiph-inspired drop-waist and skirt modification. Not sure if it’s looking ‘hippy’ possibly yes. or if the cut-away shoulders help balance it out.

Now clearly it’s a little short. Actually no. It’s a lot too short! Despite the ‘frisky’ length I’m pleased with the make. It was an interesting process… and that’s why I sew, to experiment and have fun. I could have not blogged it due to it’s length – but it’s part of my current obsession with shifts, shapes and more – I’ll just run the risk of you thinking me a ‘tart’. At some point I’ll reach the caboose of this sewing journey so forgive any hints of SBL caboose in the meantime. It’s part of the success/disaster of sewing.

Burda 7056 with Saiph-inspired drop-waist and skirt modification.

Burda 7056 with Saiph-inspired drop-waist and skirt modification.

Apart from the length, I’m not in love with the only front bodice shaping being the bust darts. Probably because this is a slightly heavier cotton sateen, I don’t like how the dress lies between my bust and the skirt – which you can also see in the white feather hem version on the pattern envelope. I don’t want this to be super fitted all through the length of my body but I think some waist shaping at the front of the bodice around the waist would be nice. That said, I think it’s great as is if it made up as just a shift dress, in fact I think it’s rather a terrific pattern for a shift.

Burda 7056 with Saiph-inspired drop-waist and skirt modification.

Burda 7056 with Saiph-inspired drop-waist and skirt modification.

If you are wondering about pattern placement… with a pattern this big it was always going to be challenging… and probably why this fabric sat in my stash so long. I love the vivid blue of this fabric but those ‘flowers’ and ‘leaves’ were challenging. I actually attached the skirt, removed it and reattached it… and I think you will agree the second try was much better!

Pattern placement = hilarious.

Pattern placement = hilarious.

so pleased to have provided a moment of mirth for you…

Like the Saiph, ELH rather likes this dress . He said “I think you should wear that dress… a lot”.

I’m now planning SBL & the Drop Waist No.3… why not… I’m having fun!

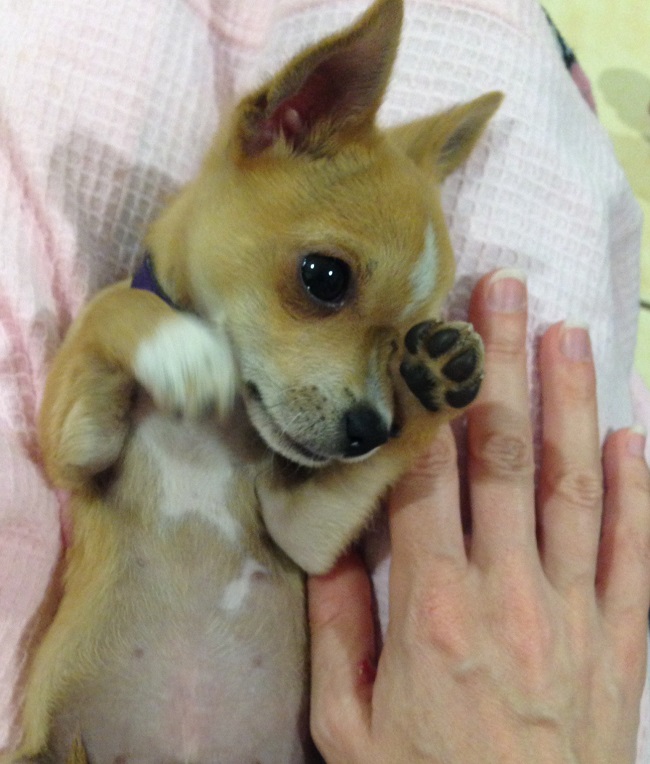
Oh and I forgot to mention last post… we have a new addition to the family… meet Midge…

Midge - the new bubba. Yes that's a Chihuahua.

Midge – the new bubba. Yes that’s a Chihuahua. Yes he is the same colour and has the same markings as Banjo – he’s twice as feisty though!

I’m betting you have now forgotten I made a dress. LOL. This post came so fast after the last post because I was pinned to the lounge by the sleeping puppy (he’s a genuine lap dog this one) so typed it up on my iPhone and read Japanese sewing books!

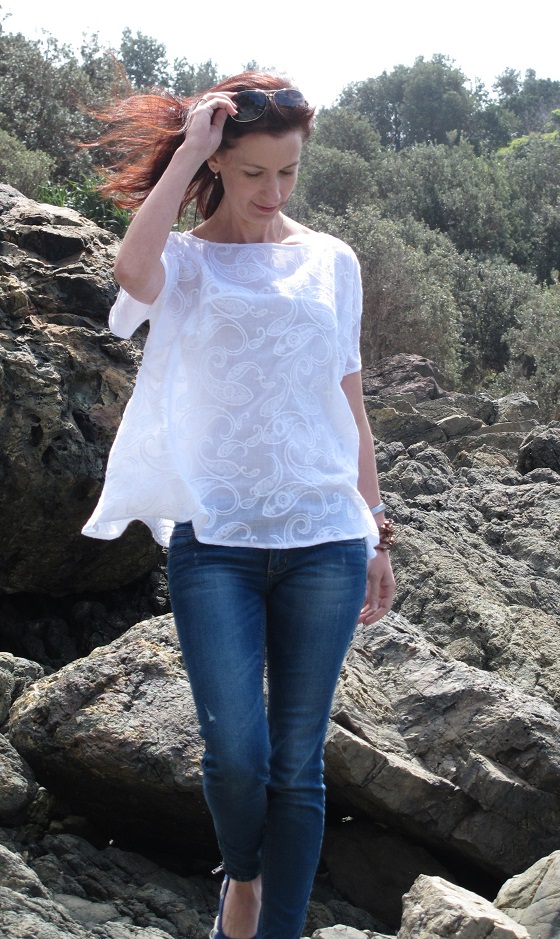
And here is a beach…

Photos taken at the northern headland of this gorgeous beach - Shelly. One of my favourite places and views in Port Macquarie.

Photos taken at the northern headland of this gorgeous beach – Shelly. One of my favourite places and views in Port Macquarie. Many of our beaches are ‘in town’ yet you don’t see a house – I love that.

Pattern: Burda 7056 with Papercut Saiph inspired modifications.
Fabric: Cotton Sateen from Spotlight (about $5 worth of fabric here!)
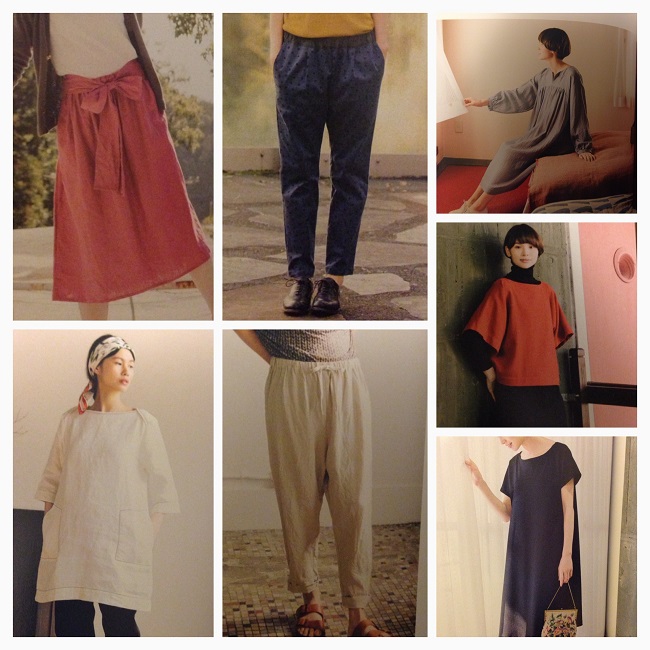
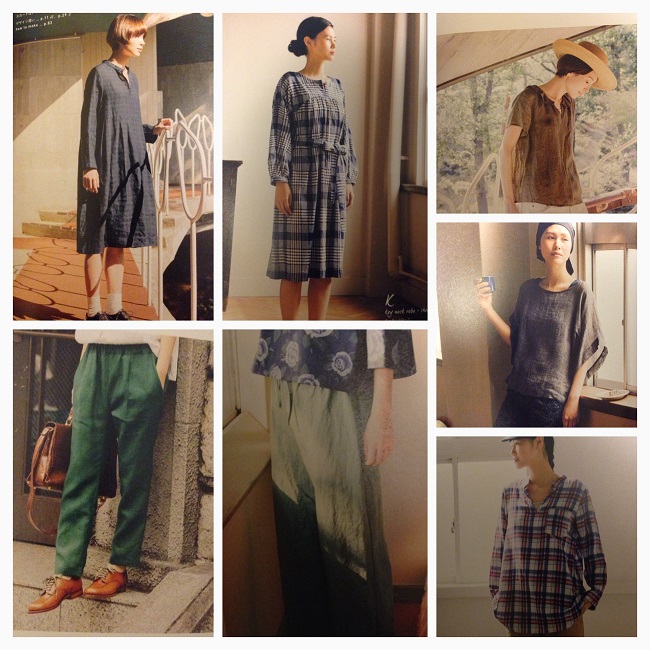
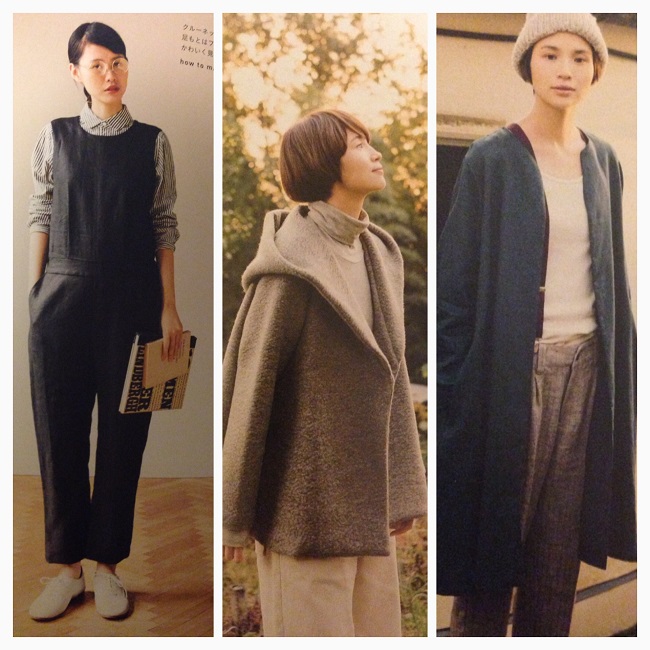
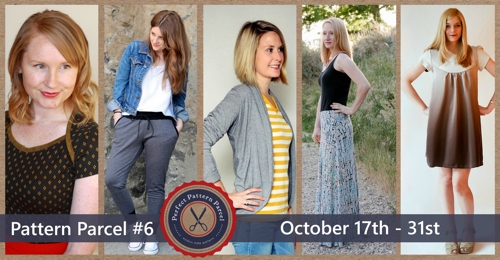
Trying New Shapes, Papercut Saiph

Lately I’ve become intrigued with trying ‘new stuff’. New patterns, different techniques and shapes.

I’ve always loved something different – even if it’s not something I fall in love with or adopt as ‘my thing’. I’m simply interested in experimenting. To me this is the huge appeal of sewing and blogging. I find the thought process, the making and subsequent photography fascinating to analyze something new. I’m ok if it doesn’t work, I’m just curious to try.

Papercut Saiph Tunic - it's loose!

Papercut Saiph Tunic – it’s loose! The armholes are also a little large. I finished these with white bias binding

I’m the first to admit that I skimmed right on over the Papercut Saiph tunic when it was released. I found it a little shapeless for my taste and was rather bamboozled that it was called a ‘tunic’ but presented as a dress. The length also seemed SUPER short.

The ‘drop waist’ was also a deterrent as I’ve only ever worn that style as a school uniform – which I always referred to as the ‘H Line’.

Papercut Saiph Tunic - back view

Papercut Saiph Tunic – back view

Then as I looked towards summer (if it should ever really arrive…) the appeal of shifts, sacks & shapelessness reared its head. Suddenly I wanted to try new styles & shapes that I traditionally shied away from. So perhaps expect The Summer of the Shift from me. The timelessness of ‘the shift’ interests me. And well… I can’t explain my fascination with sacks…

However a few Top Notch posts triggered my curiosity and I finally gave in. Then low-and-behold Rachel of House of Pinheiro popped up with her glamorous one photographed in than Paris while mine was winging it’s way over the seas from New Zealand.

I decided to make my Saiph as designed. No fitting alterations. The Full Sack if you like! I wanted to see if me and sack dresses could be friends.

That’s not to say that this dress doesn’t have any shaping. It has French darts which are an interesting and fun addition.

Papercut Saiph Tunic - inside (sorry heading off to Sydney for a shibori workshop - no time to iron! #badblogger)

Papercut Saiph Tunic – inside – I was heading off to Sydney for a shibori workshop – no time to iron! #badblogger

But what to make it in?? I decided I wanted something with some weight but drape…. and remembered the rayon viscose ottoman suiting range at Spotlight. I’d always wonder what on earth to make with it but it seemed the perfect choice for this. It’s lovely to sew with I must say!

These were the options and I decided to go with the more graphic black/white/red fabric (I love it when Instagram polling matching up your gut instinct!).

Papercut Saiph Tunic - material options

Papercut Saiph Tunic – material options

I made the XXS and added an inch to the ‘waist’ as I am quite long waisted. I also cut the skirt length to XL as I’d read how short this design was. I omitted the sleeves as I saw this as a summer dress option.

Nothing terribly exciting to tell you about construction. I ended up lopping 1/2 inch off the skirt as the extra length seemed to exaggerate the roominess of the dress on me. I finished it with a rolled hem – not using my machine foot as this fabric was quite heavy.

I used a piece of thin black cord (ratstail – the sort you can use to make piping). I created a little loop and sewed this into the seam where the facing mets the shell at the back neck opening. I think it’s a nice little detail however it is also strong and quick to create!

Papercut Saiph Tunic - button closure

Papercut Saiph Tunic – button closure

I don’t think the Saiph translates well in photographs – not on me. I really don’t. That said, it is lovely to wear and ELH commented as he took the photographs… “I’m not sure if it’s supposed to be but it’s strangely sexy”. Perhaps it’s the shorter length with the flippy full circle skirt or the way it swings and floats around the body, hinting rather than revealing… it’s a mystery. OR ELH has a penchant for sacks?

Papercut Saiph Tunic/Dress

Papercut Saiph Tunic/Dress

I’m glad I made it, I do think in cotton it would make a great summer dress/tunic. Super cool, loose & feminine. I think it could be cute in wool with long-sleeves and tights in winter…

This image is ‘blown out’ due to the bright sunshine but I popped it in as it is one of the few without my hand on my hips – must have been unconsciously searching for myself in this loose-fitting dress!

Papercut Saiph Tunic - front view

Papercut Saiph Tunic – front view.

I’m not sure I’m sold on the Saiph – which isn’t to say that I wouldn’t make it again as I think I have space in my life for loose summer dresses. This make got me curious and I experimented with another idea… coming to a blog soon!

Pattern: Papercut Saiph Tunic
Fabric: Viscose Rayon Ottoman

Perfectly plain ‘Flared Pullover’ blouse – Clean and Natural

Now for an exceptionally simple top!

Flared Pullover from Clean & Natural (Japanese sewing book)

Flared Pullover from Clean & Natural (Japanese sewing book). Sewn in a light embroidered cotton.

This is my first ever make from a non-translated Japanese sewing book – and I thought it best to pick something really simple to get a feel how I would go just using diagrams – no instructions! Bingo. Successful top. This little pullover top has four pattern pieces, front & back yoke, front and back body piece. I did get a bit confused – I blame tracing the pattern at 11pm – and added the wrong seam allowances to the neckline and sleeves. Fortunately I noticed this before I cut it out and all’s well that ends well!

Curved yoke, Flared pullover from Clean & Natural

I love the gentle curve of the yoke.

I chose not to cut ‘self’ bias binding for the neckline – the embroidery on this fabric is quite heavy and chunky to sew through. I did not see a Battle of Bias being won by me. I used purchased white bias binding instead. I didn’t like how I could see the bias fold when I turned the binding to the inside (picky much Lizzy??). So I doubled it over as I folded it to the inside and achieved a very narrow neckline hem. This fabric is very sheer, a beautiful embroidered cheesecloth (?) style fabric from the only indie fabric store (for dressmaking fabrics at least) in Port Macquarie. Due to the fabric’s sheer nature I also chose to keep the sleeve hems minimal as I felt the slightly wider recommended sleeve hems would have looked heavy and out of balance with the neck binding. I didn’t French seam anything as the fabric is quite lumpy. Just sewn and then the seams overlocked together, rather than pressing the seams open and flat. In these photographs I’m wearing it with a ‘nude’ camisole – and always will for obvious reasons (unless it’s thrown over the top of swimwear!). top1 I must say, I do love this top. Yes it’s not sewing rocket science but it’s beautifully simple and easy to wear. It will get worn a lot as a result! I love the curved yoke and easy fit. It’s just ‘clean and natural’ in keeping with the book title. I do prefer simple tops with yokes, rather than the fabric just falling from the shoulder, I like the fit across the shoulders and upper chest, rather than just loose everywhere. Top 1 - Clean and Natural 10 The flared style of the lower section is just lovely. I love how the back falls below the curved yoke. Top 1 - Clean and Natural 2 Top 1 - Clean and Natural 1 Not much else to say about this basic top.

Clean & Natural - a Japanese Sewing Book (untranslated)

Clean & Natural – a Japanese Sewing Book (untranslated)

This book has patterns drafted for women 160cm in height, bust 79-91cm, waist 60-72cm & hip 86-90cm. Here are the makes from this book Clean & Natural. The designs are predominantly simple in nature and like Burda Style several makes are variations on a style – this top also has ‘cousins’ in a longer sleeved top, a dress and a long-sleeved long dress. makes3 The orange top has my name on it – perhaps in an emerald wool crepe I’ve been hoarding! makes2I do like that simple plaid shirt with a collar stand and placket. I can see me wearing that a lot! makes 1 Please pop over and visit Japanese Sewing Books – this is a great resource for these books. She has reviewed this book in full here. makes4 I confess I fell hard for this book when I spotted the hooded coat. I need that in my life! Whereas it was the onesie that sent Top Notch scuttling off to the bookstore when I was showing off my purchases at afternoon tea prior to Frocktails in September (I can confirm she is just as fabulous and stylish IRL, note: she would never scuttle just glide in some uber-fab heels).  Thank you to the lovely Kat of All the Whimsical Things who was not only my roomie for the weekend but also Ms Frocktails herself. She’s a beautiful soul (and is a true fabric enabler!). This was photographed on the same day as the Japanese t-shirt and the koala hunting trip – the kids asked to go to ‘the rocky beach’ at lunchtime so we took the opportunity to take these snaps while the kids searched for shells and pretty rocks on this little deserted part of paradise. Gotta love Port Macquarie. Pattern: Flared Pullover from Japanese sewing book ‘Clean & Natural’ purchased from Kinokuniya, Sydney Fabric: Embroidered cotton.

JEANS IN JUNE and JULY ROUND-UP

Well I started off with great intentions… then life caught up with me… as it is apt to do… Huge apologies that this has come so late. It’s such a big post to create. So many images and so many bloggers and so many hyperlinks. I’ve been plugging away at it for ages! I did finish my Jamie Jeans… they were not perfect but it was a start! I’ve always wanted to try making jeans and I must admit I did find all the detail lots of fun and I have no doubt I will be back making jeans sooner or later… just for the sheer hell of it if nothing else. I sew because I love it, it’s not always sensible, reasonable or practical… but it’s my hobby so God forbid it becomes a drudgery!

Jeans in June & July 2014

Jeans in June & July 2014

This has taken me FOREVER – so many images – so many bloggers. If I have missed your jeans – please let me know in the comments below so I can include you! So here are my Jamies – for better or worse (definitely worse) fit.

Named Patterns: Jamie Jeans. Checking out my own legs...

Named Patterns: Jamie Jeans. Stupid, stupid fabric choice… I’d love to say you live and learn but I tried this fabric in another make. #idiot

And here are the brave sorts who also braved the Jeans Journey… all images linked to the blogs so you can read more! If I have missed your jeans – please let me know in the comments below so I can add you in! I’ve been going bananas tracking them all down! Blanc at Bleu – Jamie Jeans!

Blanc Et Bleu

Blanc Et Bleu – Jamie Jeans!

Oz Viking – couture style jeans!

Oz Viking - Couture Jeans! WOW!

Oz Viking – Couture Jeans! WOW!

Purple Pleats – jean shorts

Purple Pleats - Jamie Jeans turned shorts!

Purple Pleats – Jamie Jeans Self-drafted turned shorts!

She made a muslin in July so I think these technically count as Jeans in June/July!

Sewing by Shirley - Jamie Jeans!

Sewing by Shirley – Jamie Jeans!

Handmade by Chris. Jalie 2908 Bootcut Jeans... why haven't I made bootcut jeans? I love them!

Handmade by Chris. Jalie 2908 Bootcut Jeans… why haven’t I made bootcut jeans? I love them!

The Angela Wolf Slender Bell Jean by Lindsay - go and check out the pockets!!!

The Angela Wolf Slender Bell Jean by Lindsay – go and check out the pockets!!!

Lady Sewalot - Simplicity 9944!

Lady Sewalot – Simplicity 9944. (Note gingham pocket linings!)

Jamie Jeans by design by Lindsay - amazing!

Jamie Jeans by design by Lindsay – amazing!

Now I wasn’t sure which jeans muslin to post BUT you must go and read all the jeans fitting posts and amazing detail over on Infectiousstitches. Go over there and read the June, July, August posts! In fact her posts about everything is very detailed and interesting!

Maternity Jamie Jeans! by Everyday Notions

Maternity Jamie Jeans! by Everyday Notions

Quixotic Pixels: Burda 03/2014 #115, a not-so-low rise skinny jean. WIP

Quixotic Pixels: Burda 03/2014 #115, a not-so-low rise skinny jean. WIP

Sew & So - Skinny Jeans!

Sew & So – Skinny Jeans!

Check out these amazing jeans at The Confident Stitch!

Check out these amazing jeans at The Confident Stitch!

All images remain the property of their original owners! All images linked to the blogs so you can read more!