Sway Dress, a simple LBD – Papercut Patterns

Recently I sent Katie at Papercut Patterns an email because I was searching (unsuccessfully) for a copy of the Pleated Pants pattern and noticed that it was sold out online.

Katie let me know that it was indeed out of print (*sobs* she who hesitates is patternless). Then she told me she had a new trouser pattern coming out and would I be interested in trying it… well… yes!

Sway Dress by Papercut Patterns

Sway Dress

I know this is not even nearly a pair of trousers… Katie sent me a few patterns and I was swayed by the Sway Dress immediately. I know. I get distracted easily. #squirrel

Why? It’s a very simple dress and often I’m drawn to patterns with details or unusual shapes (hello Drape Drape). However it is something that I could see myself wearing in a solid or a floral. Dressed up and dressed down. While I wear a lot of fitted sheath dresses to work, so I tend to prefer softer, loosely fitted styles when I’m not at work. I guess I just feel more relaxed in them.

Swingin' in the Sway

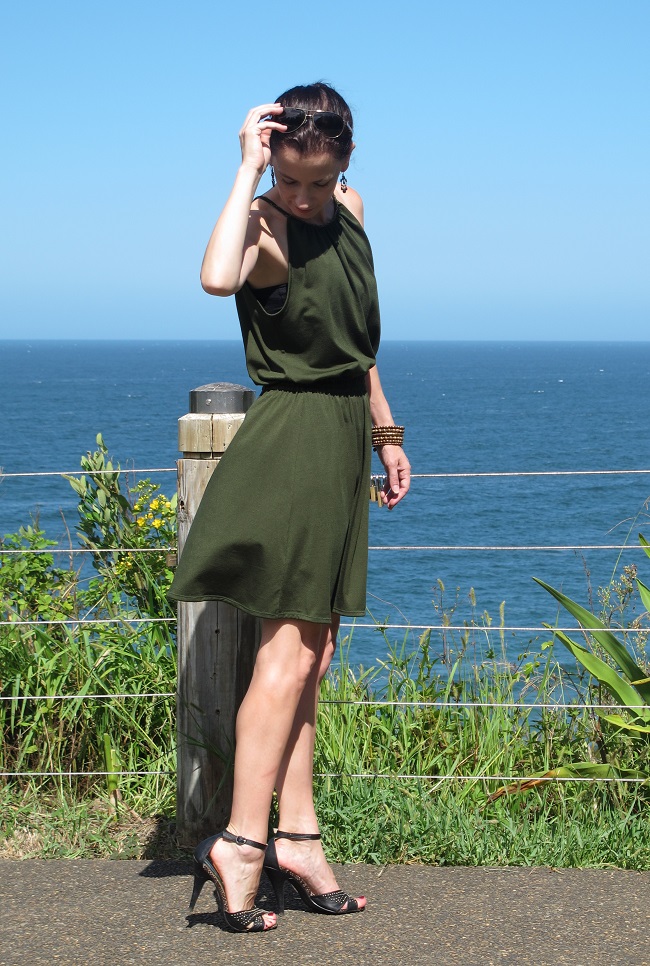
Swingin’ in the Sway

While I had planned to make this is a floral, when I stumbled across this strange micro-pleated woven fabric in Spotlight it just seemed perfect… and on a bargain table!

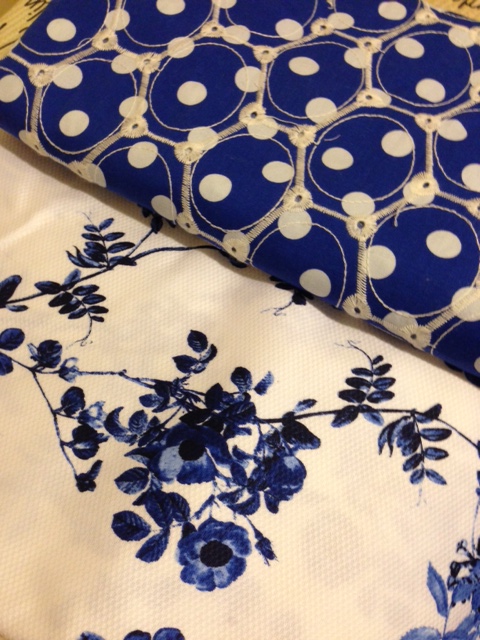
I chose not to create a self-fabric belt – mainly because of the pleats in the fabric. I felt having the pleats run one way down my body and then another way across my waist would have been distracting. So I’ve used a black satin ribbon instead. This fabric does not fray at all so I let the dress hang for 24 hours and then re-cut the hem so it was straight (it did drop all over the place). Yes you read that right – no hem on this LBD.

I don’t like these photos. I’m just so tired at the moment. Everything feels a little blah and I had horrid hair after a morning at the beach – seaspray is not my hair’s friend. That’s life though – and we are here for the dress not me LOL. If I don’t blog now – who knows when I’ll do some more photos!

Sway Dress - back

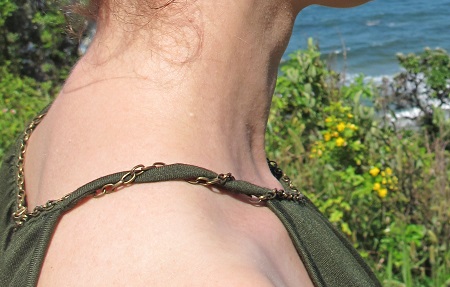
Sway Dress – back neckline. Not a great picture but this is just to show the shape of the back neck (you can wear the dress either way)

FACINGS…

I used black tricot for the facings, interfaced with a light tricot interfacing. Yes I said facings… and like my Top with Epaulettes I think this is a superior way to finish this particular dress rather than bias binding.

As the dress is sleeveless, the facing is attached using one of those Houdini methods… you know those type of sewing steps when if you haven’t done it before, you read the instructions, google, re-read the instructions… take a deep breath and then sew. If you have sewn a button-up shirt using the yoke burrito method (as seen here on the Grainline blog)… then I think you will master this technique easily. While the yoke is different, you do rolled the dress over to one side and then wrap the shoulder around the dress – I know, sounds weird but works perfectly. While I could demonstrate this on my blog, there are plenty of bloggers who have already done so – so check out Poppykettle for starters. My lovely friend Marjorie in Brisbane also emailed me a tutorial as well – so this was easy – just needed a little sewing faith.

BELT LOOPS…

Rather than making self-fabric belt loops I created thread loops. I had not made these before… however thread loops are SERIOUSLY the simplest thing to create. I cut six lengths of Gutermann thread (just my normal thread) I tied a knot at one end. Then I set my machine to a zig-zag stitch with the width at 3 and length at 1. I held the threads behind and in front of my machine foot with a light tension and away I went. Yes, it’s that easy.

sewing thread loops

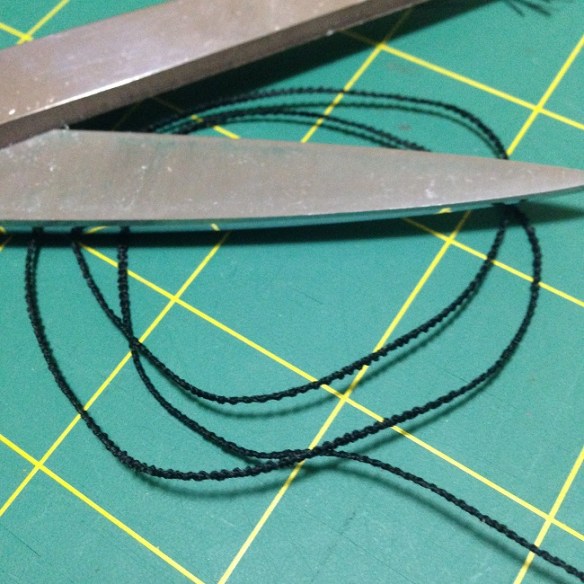
my first self-made thread loops

I found this tutorial on Coletterie very helpful.

THOUGHTS…

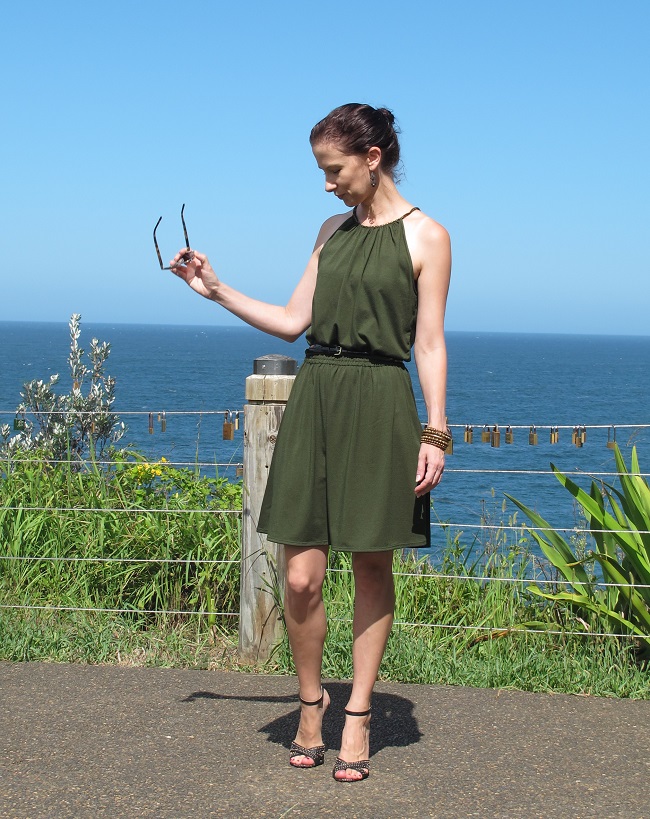
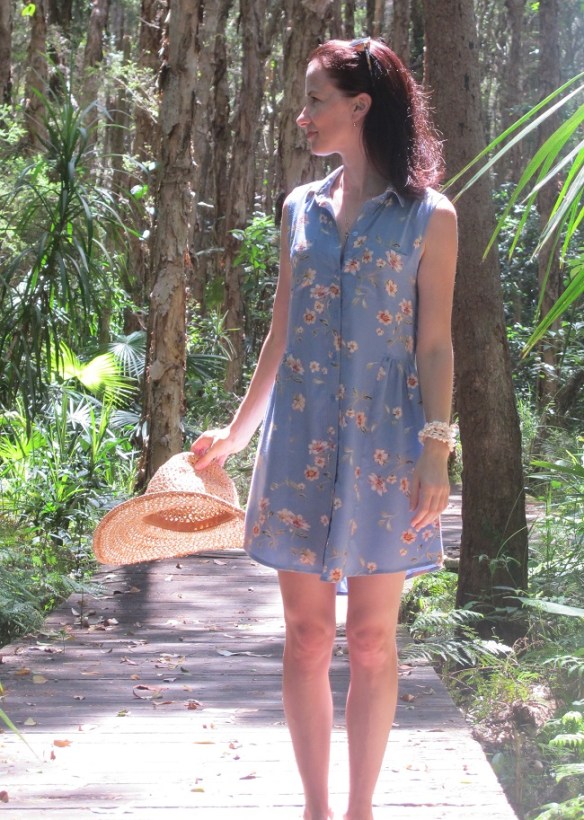
It’s such a simple dress, four pattern pieces. Sometimes that’s just what I love to wear the most – very simple clothes that fit (loosely) and flatter – that’s enough more days than not. This is one of those dresses where you can let the fabric sing. Now I want one in a floral (of course). You can bet there will be exactly that in my summer wardrobe this year.

An amazingly quick and gratifying make. I love the neckline and you can wear it either way. I love the V-neck, it’s not too deep or too wide.

This dress has a front and back centre seam. I did think about eliminating them – however with this fabric you can’t see the seams so I chose to leave them.

I love Papercut Patterns. I’ve actually got quite a collection, I just haven’t had a chance to sew them all, except the Saiph Tunic and the Bellatrix Blazer.

The patterns come in a sturdy cardboard package, the pattern photo can be removed from the package… where you will discover all the measurements and fabric requirements. These really do look and feel like excellent value for money – the sort of pattern you keep and display on your shelf. Check them out here.

The patterns are easy to trace and the instructions are thorough without being too wordy. You can cut up the pattern and cerate a booklet from the instruction section of the sheet – however I can’t bear to cut these lovely patterns up.

STILL TO COME…

The Guise Pants (traced). I was initially a little hesitant about these – the back waist is elastic however I’ve seen some great reviews (Gingermakes and Jolies Bobines – and I am going to try them. In basic black. I’ve also cut out the Flutter Tunic .

GIVEAWAY TO COME…

Katie has offered a Papercut pattern as a giveaway – I’m a little tired this week so let’s do it with my next Papercut make! Watch this space.

Pattern: Sway Dress by Papercut Patterns, I made XXS cut to the longer hemline.
Fabric: Mystery woven from Spotlight (bargain table)
Shoes: Urban Soul (I do love these crazy shows but they have a history so I’m not overly fond of them… #itscomplicated – chosen by Miss 10 for these photos). I really need a pair of classic black patent heels… I got distracted last shoe shopping trip… it happens #squirrel

Note: Papercut Patterns provided this pattern for preview purposes. All opinions my own. No affiliate links in this post.

This post first appeared on http://www.sewbusylizzy.com

Pauline Alice: the Eliana Dress

aka The Wistful Dress. Life is has been busy and TBH ‘worse than yuck’ I need something/anything to go right… my girls love this dress so I’m taking it as a ‘win’.

This was one of those projects that I wanted to be perfect but just isn’t quite. Nothing major, I’d like the straps to be topstitched (see below), I should have made the elastic slightly tighter and the armholes are a little low.

Nevertheless I’m not lying on the sewing room floor in a state of abject misery… in fact I’m planning on wearing it tomorrow!

Back view. Pauline Alice Eliana Dress

Back view.

This is the Pauline Alice Eliana Dress. I’d never purchased a Pauline Alice printed pattern before and I must say I am impressed! I purchased the Carme blouse PDF ages ago but it hasn’t made its way into ‘The Queue’ for stitching just let.

The packaging is glossy cardboard, the instructions are in a neat little black-and-white A5 booklet (in English, French and Spanish) and the pattern is printed on large sheets of bond paper. The packaging is generously sized and it all goes neatly back together with plenty of room for your traced pattern – if you are the tracing type. The paper patterns are not cheap but the production quality is excellent.

I purchased my pattern from Caitlan of Indie Stitches. Her service and packaging was outstanding, I found via Pauline Alice’s site which lists Indie Stitches as the only Australian distributor of the paper patterns. I don’t mind PDFs but I avoid them if there is no A0 option unless I’m so keen I can’t wait for a paper pattern to be delivered – The Perfect Nose blogged about this today – and I agree with many of her points.

I contacted Caitlan via email as it didn’t appear to be in stock. She replied that it was ‘on it’s way’ and would let me know when it arrived. I was equally delighted by the detail of her business packaging when the pattern arrived (ok, it was ‘patterns’ as I’m besotted with the Pauline Alice Quart Coat & decided to purchase it as well). I do love thoughtful packaging… and the Indie Stitches envelope was stitched shut, the protective packaging sealed with fabric tape and the business card is gorgeous. That sort of thing makes me go ‘squee’ at the mailbox. LOL.

Pauline Alice Eliana Dress

Front view: Pauline Alice Eliana Dress. I have a nice new scar on my leg that I’m hoping will fade. A child’s toy box leapt out and bit me a few weeks ago… or I could have been tired and bumped into it. Whatever… it was ouch and quite a bit of blood!

PATTERN ALTERATIONS

I added half an inch to the bodice as I am long waisted plus I wanted a ‘blousy’ top.  The length wasn’t an issue for me as it is drafted for a height of 165cm and I’m 164cm tall.

I graded out to 36 at the waist and skirt as I wanted generous gathering & a swinging skirt.

I decided not to put in the pockets as I was concerned they might look obvious with the knit jersey.

WAIST ELASTIC

As confessed in my Japanese skirts post, I’m not a huge fan of elastic waists but I think I’m coming around… in some cases.

I decided to omit the buttonholes and forgo a waist tie. Sometimes it feels a bit like gym shorts to me. I added a line of stitching in the middle of the elastic casing channel and used two thin strips of elastic instead of one wide one. I just prefer the look of two gathered rows than one thick one.

A very simple way to soften a thick elastic waistband- just sew two channels and use thinner elastic. Eliana Dress by Pauline Alice

A very simple way to soften a thick elastic waistband- just sew two channels and use thinner elastic

I’m going to add some belt carriers at the waistline (I’ve already made them) as I hate how a belt sometimes slides above or below the elastic.

I do like the waistline casing on this pattern. You sew the bodice and skirt together, neaten the edges together and then fold the skirt up towards the bodice, sewing a 3cm seam to create a channel. This makes the waistline hug the dress against your body which I think is a nice finish.

NECKLINE

Sewing those jersey strips in jersey was NOT FUN – yes Busy Lizzie warned us about that in her jersey Eliana dress post… but I had my heart set on a khaki jersey Eliana. If you are making this in jersey, I did some googling and you don’t need to cut jersey ‘bias’ strips on the bias. You can cut them on the grain with the greatest amount of stretch – well that’s what I read on this post by Made by Rae. Worked for me!

I machined the strips to the bodice and then turned them over and hand stitched them in place. I also slip stitched the edges of the long back ties and shoulder straps together. Yes. It turned a quick make into a long make, however I found it difficult to get a neat line of top stitching over the strips & gathered jersey. I knew wonky stitching would bug me so I opted to hand sew. I had a hideous week so the downtime taken stitching was much needed & appreciated!

I stitched a ‘boho gold’ chain along the neckline to add some interest. I also like ‘old gold’ tones with khaki. The chain meets with a necklace clasp at the centre back. I chose to wrap the chain around the shoulder straps and leave the tails hanging down my back. I left the jersey ties in tact – in case I decide to remove the chain in the future.

Simple 'boho gold' chain added to the neckline and twisted around the shoulder straps.

Simple ‘boho gold’ chain added to the neckline and twisted around the shoulder straps.

ARMHOLES

The armholes are low. My wardrobe ‘fix’ was to wear a black bandeau top over my strapless bra (which is ‘nude’ colour – not so attractive as a ‘peekaboo’ option). It cut in slightly as you can see in the pictures – which of course annoys me so I’ll have a think about that…

I don’t think it would matter as much with long sleeves but it’s something you might want to consider with the sleeveless version – plus it’s not bra-friendly.

Pauline Alice Eliana Dress

The underarms are LOW.

HEM

I used some Emma Seabrooke Knit stay tape from Stitch 56 (popped up in my facebook feed on night) and a double needle on my Bernina machine. I have no idea why but it had never occurred to me to baste the stay tape the wrong side of the hem and then turn it up and iron in place (recommended on the package). I know – I’m an idiot. So much quicker, easier and neater – this tape is very nice too.

CONCLUSION

It’s a simple make & easy to wear. Apart from all my hand stitching & attaching the chain, fiddling with pliers etc, this dress came together quickly.

I think it would make a lovely maxi dress in a woven rayon. It would make a gorgeous winter dress with long sleeves, tights & boots.

I’m wearing it tomorrow. Win.


Pattern: Eliana Dress by Pauline Alice, purchased from Indie Stitches– the only place in Australia to buy the Pauline Alice paper patterns.

Fabric: a rayon knit from Spotlight. From my ‘Fabric Library’, purchased for about $15 a metre.

Accessories: Shoes for Manning Valley Shoe Store – ages ago from the ‘bargain table’ for a ridiculously low sum… like $20 | bangle from my workplace shop (it’s a hazard walking in the office)

Also see: Busy Lizzie in Brissie | By Maggot | Top Notch | Couleurs et chiffons

These sunnies on-off pictures amuse me. It's like a tic!

These sunnies on-off pictures amuse me. It’s like a tic!


Note: Caitlan kindly offered me a little discount – however I was purchasing it anyway. I like to spread my self-indulgent expenditure around the sewing business world. A good thing too… I’ve never blogged the size of my pattern stash… it’s considerable!

It’s a wrap (dress)… Butterick 6054

I’m rather amazed I haven’t made a wrap dress until now as I love them.

Butterick 6054

I think I’m rather ashamed I’ve never sewn one of my favourite styles before!

Maybe it was my early fear of knits… my inability to source quality knits locally… anyway – whatever the reason, I’ve made one now. Funnily enough it is very similar to the pattern envelope! I had planned to make McCalls 6884 however I chose this instead as the McCalls is a ‘mock’ wrap dress and I like ‘real’ wrap dresses (I still want to make 6884 of course).

CUTTING OUT

I find some knits challenging to cut out. This knit is a very soft cotton jersey from The Fabric Store, Sydney. While it’s not ‘slippery’, it does have lovely drape and wants to flop about. I started to set up on the floor (which is tiled so it’s an endurance) then suddently realised that my bed was a much more agreeable height. So I laid my cardboard mat on the bed and found the process much less exhausting – my knees thanked me. Clearly this style of cutting is not for using a rotary cutter, I used my shears.

I also thread marked all the notches, pleats and so on. I find some knits slide around if I’m trying to drag chalk over them – or any marker for that matter. Using a needle and thread is a little more time consuming but the accuracy makes it worthwhile.

PLEATS

Those lovely skirt and bodice pleats are a little challenging to sew through. The pleating is simple enough to do… however you end up with 11 layers of fabric just on the skirt piece. The bodice has two pleats and when you join the skirt to the bodice, there is another pleat across the waist line seam… to top it off you also need to attach the tie to the gigantic wad of fabric. It was quite a challenge to feed through my machine.

Butterick 6054

Please excuse my ancient cutting board, complete with toddler scribbles.
Focus on the pattern… that is a LOT of pleating for a knit…

As the front pleated skirt curves up towards the waist, the side of the top front hemline is curved upwards. I find that the squared-off corner of the other side (under the pleated wrap front) wants to perform ‘peek-a-boo’ – which I find annoying as it looks messy… to me… I’ve often said I’m stupidly fussy about minor visual details.

If I made this again I might curve the corner of the inside wrap skirt piece. I think this would minimise the visual distraction the squared off corner creates. My cure for this one? I tuck a tiny bit of the fabric on the inside into the side of my knickers to bring the edge up a tiny bit…. shhhhh don’t tell anyone. The fabric is so busy, and the pleats so distracting you would never know… except I’ve told you. Ooops.

Butterick 6054

The wrap does blow open a little and the wrong side can show… so it’s a classic wrap dress in that regard! The wrap is quite generous so I had no concern I would have a ‘whoops’ moment

TIES

I found these far too long. I’ve left them, however the tie on the side that goes under the front wrap and through the side opening is huge! I wrapped it around my waist twice (going under the front and through the side opening each time as I find all those ties wrapping around the front and over the pleats to be rather visually messy) and tied it as the side with the pleats.

I’m personally not a fan of ties that meet at the centre back. If you are sitting in a chair, having a lumpy knot between your spine and the chair is not comfortable. I also think it looks better at the side than dangling down over the junk trunk. Just personal preference.

SIDE OPENING FOR TIE

I Double stitched the seam around the opening for strength. I then used thin strips of lightweight hem tape to fuse the loose edges down rather than hand stitching them. Not because I’m lazy (I hand stitched the wrap facing down and to the waistline) but because I thought it would be neater and stronger and I’m happy with the finish. Sorry no photos… as you can’t see the fusing and the seam is now completely concealed and sealed away from prying eyes by the fusing tape.

NECKLINE

I found this neckline stayed in place all day and did not gape at all.

Butterick 6054

No neckline gaping whatsoever… happy days!

I didn’t actually cut the precise length of the band or bother to mark the notches and so on. Instead I simply pinned the band along the neckline, stretching it ever so slightly as I pinned, rather like attaching a neckband to a t-shirt. Just pulling it up ever so slightly to ensure there was a little tension to pull the neckline back against my skin. It appears to have worked a treat.

I used my coverstitch machine to stitch the band down after I attached it.

I also used some tape in the shoulder seams to stabilise them due to the weight of the fabric. Knit is strange stuff… it can be so heavy!

HEM

I always find hemming knits rather daunting. It is either smooth sailing or a turbulent trek of horror and frustration… sometimes involving hyperventilating. While the instructions have you turning up the hem and steaming out the curve etc. I found that this hem turned up very easily without any excess fabric to bother me. I simply turned it up, steamed it into place and then hand basted it into place. I often find encountering pins in the machine hemming process rather messy and sometimes results in a break in the rhythm of the stitching. I like to sew a consistent speed when hemming, no pauses and this seems to work – especially with my coverstitch machine, she’s a little… well… moody at times.

Butterick 6054

hmmmm, I’m undecided I think this makes the caboose look hmmmm, curvy….

FABRIC

It feels divine, soft and cuddly. The staff did say they had feedback that the black bled into the white when it was washed. And it did. Badly so. I washed it twice and hung it so it wasn’t touching as it dried. Only time will tell if it’s a repeat offender! I think I might search for some dye ‘fix’ solution – that must exist!

Likes

  • It’s a wrap dress. It’s a classic just not because it looks great on many body types, it feels like PJs!
  • Lovely neckline.
  • Pleats at the waistline that somehow manage to highlight curves and conceal bumps at the same time.

Dislikes

  • Not sure about kimono styles on me. I feel my shoulders look droopy. I think I prefer sleeveless or 3/4 sleeves – or a style which highlights my shoulders rather than covering them.
  • The huge volume of fabric at the waist… soooo many pleats.
  • The very, very long ties.
Butterick 6054

My choice of fabric unfortunately hides many of the details of this pattern, such as the lovely side skirt and bodice pleating. It was starting to rain – hence the little blurry spot on the camera lens right on my tummy/hip!

I don’t like this style on me quite as much as my cowl-neck dress, however it is perfect casual workdress – I don’t have to look super-corporate every day so it’s a great choice for those days at the desk when you just want to be comfortable.

While it’s not my favourite make, I wore it to work this week and got lots of compliments… and it felt like PJs #winning

Pattern: Butterick 6054. Size 6.
Fabric: Cotton Jersey from The Fabric Store, Sydney
Shoes: Sempre di by Biviel. I have had these forever… and they are slowly dying *sobs*. I actually wore my new red Miz Mooz shoes to work with this dress – however I like the monochrome look. I know – stupidly fussy again. (no affiliate links – I just buy stuff I like)

ON THE RADAR…

Sewing: I’ve sewn a Japanese pattern book skirt this weekend. It’s not fabulous but I suspect it will get worn a lot as it is comfortable! Blog post and photos soon. This is part of the Japan Sewalong (more info on how to participate here).
Life: December/January was overwhelming. Work & family stuff have been challenging to say the least. I don’t have much on the 2015 Fun & Frivolity Schedule… no holidays on the radar. However I will be hanging out with my sewing-soul-sister Busy Lizzie in Brissy at the end of March for High Tea. I have a zillion things to do in Brisbane as my Sydney trips are limited at the moment… including shoes and of course The Fabric Store, Fortitude Valley.
I’ll be down in Melbourne in August for Frocktails. Hope to see you then!

Grainline Alder in vintage rayon

aka #teambumruffle

I wasn’t going to blog this for a while… but back to work tomorrow… so it’s a final holiday hurrah. Sorry for spamming you in the last week! I’ve mentioned before I’m an obsessive stitcher… and my last Alder is proof!

Grainline Alder view B - back view

Grainline Alder view B – back view

So that pattern I wasn’t particularly entranced by when it was released? Yeah well… I’ve made three of them since November.

Here we go with the view I liked the least… and now find it has grown on me… View B – the one with the gathered sides and back.

Then it came up as a joke on Instagram that this version was #teambumruffle (recently blogged by Funkbunny and also made by The Stitcher and Gatherer – not blogged yet) which made me laugh… and then I wondered if I needed to re-think this one as there seemed to be quite a fan club out there.

Grainline Alder View B - side view

Grainline Alder View B – side view. The armholes are slightly large but I prefer that in a summer dress, especially on our hot and humid days.

I wasn’t sold when I first put it on… and I confess it has grown on me. It’s been very, very hot lately and this is the perfect summer holiday dress. I don’t like wearing shapeless sacks as they swamp me, but the details of a collar and buttons provide some definition to this make and I do like that. I think the ‘girliness’ of this suits the pretty vintage fabric that I have been hoarding for a year or so now.

Attaching the skirt: It’s worth the three lines of gathering stitches recommended by Jen – the skirt gathers up nicely and it easier to attach to the bodice/shirt fronts.
I would also recommend referring to the online Alder sewalong when attaching the gathered skirt, it’s a little trickier than your standard gathered skirt shirtdress.
I did shorten this by 1 inch as I had read the back is rather long and I’m 5 foot 4… However the front is somewhat shorter than I anticipated so I would probably adjust the dip in the back and leave the front length next time. Then again… how many Alders do I need?
If you want more construction details, check out my Polka Dot or Blue Alders.

Grainline Alder View B, front view - a bit too short, ok for summer casual though I guess.

Grainline Alder View B, front view – a bit too short, ok for summer casual though I guess.

Since I have nothing else startling to add (other than my first impressions of this as a pattern release – and even when I first put it on – were wrong), I wanted to share The Thong Tree with you. Yes, yes. I know. In other countries ‘thong’ refers to a rather brief item of underwear. Here in Australia, it’s footwear – or as you might call it – a flip-flop…

This is a 700m walk up the beach, perched on the sand dunes with a stunning view – which Banjo rather enjoyed.

The Alder, the whippet and the Thong Tree

The Alder, the whippet and the Thong Tree

Lighthouse Beach Thong Tree

Lighthouse Beach Thong Tree

This local festive oddity only appears at Christmas time and is a ‘gift’ from a local artist. You can read about it here. We took Banjo for a walk on the beach as we had a spare hour or two the other day. Unfortunately the wind was howling and the #bumruffle was in full flight – or the dress plastered against my body… the perils of beachside living! Hence the photos in the ‘bush’ behind my house – the only place safe from the wind.

A windy day on a classic sandy Australian beach

A windy day on a classic sandy Australian beach

It’s odd, these days I don’t like going to the beach and not taking Banjo with me. That limits the beaches we can visit… but I don’t really mind.

Pattern: Grainline Alder, View B
Fabric: Vintage rayon from the charity/op shop. Cost = $3

OK I’m done with Alders for now… I promise! Are you on the fence about this pattern or a fan of Alder? It’s taken me three versions to get off the fence and acknowledge that I am a fully-fledged member of the fan club.

Grainline Alders x 3

Grainline Alders x 3

GRAINLINE ALDER and a WHIPPET…

More obsessive sewing.

I did mentioned I had made another Grainline Alder and here it is. I’ve worn my first Alder so much that a second one seemed sensible. If it works for you – sew it I say! I’ve worn by McCalls 6696 just once, it’s lovely but I feel at home in my Alders.

I’ve sewn View A again, this time in a border print (or more like dip-dyed, marbled) rayon woven fabric.

Another Alder, more beach and whippet photos... a typical Lizzy weekend.

Another Alder, more beach and whippet photos… a typical Lizzy weekend. I love this beach, it’s not too busy. Lots of space of a whippet to run,

The sewing

As the graduation in colour ran from selvedge to selvedge, I cut the Alder on the crossgrain. I also didn’t have quite enough so I shaved about 1 inch off the side seams. It was frugal cutting at it’s very best and I had the tiniest pile of scraps you can imagine when I finished… and I was very conscious not to make a mistake as there was nothing left to cut another piece – not even a pocket piece!

Grainline Alder, view A. Side view

Grainline Alder, view A. Side view

Pockets: I moved the pockets up about 1/2 inch. I think they could move up more next time.

Hem: I hemmed it. I wasn’t pleased with my finish. So I hemmed it again. Then I took some photos and thought it was slightly too long. So I cut off the hem, slightly increased the curve at the side and re-hemmed it.

Grainline Alder, view A - wide view. The hem is even - it's just windy (as usual) and I like to leave the bottom button undone as the dress moves better as you walk.

Grainline Alder, view A – wide view. The hem is even – it’s just windy (as usual) and I like to leave the bottom button undone as the dress moves better as you walk.

Buttons: I got some lovely buttons that were a perfect match. I made the buttonholes… started sewing on my buttons… decided the buttons were slightly too large. Fortunately I had not cut the buttonholes! I found more buttons, unpicked the buttonholes and re-did the buttonholes. I want to unpick the buttonhole on the collar (which I haven’t cut fortunately) as it is slightly too low.

Grainline Alder, view A. Back view

Grainline Alder, view A. Back view

The Fabric: this is a marbled, graduated rayon fabric from The Fabric Shop in Robina. It’s just a hop, skip & a jump off the freeway on the way to Brisbane. It’s got parking out the front, a refreshing change from Brisbane which can be a parking nightmare, especially around The Fabric Store in Fortitude Valley!

Despite vowing not to add to my fabric ‘library’ on this trip, I succumbed to some blue fabrics – which seemed to be in plentiful supply in this shop! There were lovely piques, sateens, embroidered cottons, Japanese fabrics and a range of fabrics that Maria (the owner) imports from Madrid. I loved the white cotton broderies – which I’m still wondering why I didn’t buy as they would make gorgeous summer tops… then I look at the size of my fabric ‘library’ and remember why that’s a good thing!

This fabric was the end of the bolt (I think it was about 1.5m) and Maria slipped it into my bag when I bought the two fabrics below… clearly I have a thing for blues – thank you Maria. The Fabric Shop does have similar fabrics to this one – I just got the last sliver of this one – sorry!

A cotton pique and an imported embroider cotton eyelet

A cotton pique and an imported embroider cotton eyelet

Pattern: Grainline Alder, view A. Purchased by me.
Fabric: An ‘end of the bolt’ piece, woven rayon from The Fabric Shop.

I’m on a Grainline binge at the moment. I’ve also just made the Hemlock tee (the free Grainline pattern) with some striped cotton knit from The Fabric Store, Brisbane.

WATER-LOVING WHIPPET

The following photos are for those who love to see Banjo on the blog.

There are quite a few whippets in Port Macquarie now. None of them seem to love the water quite like Banjo does. He will spend more time swimming than running if the family are in the water and he attracts a lot of attention as whippets are not famed for their love of swimming… although no one has told Banjo that…

Yes, my whippet even enjoys body surfing!

Yes, my whippet even enjoys body surfing!

I love this shot, he's such a happy handsome hound

I love this shot, he’s such a happy handsome hound.

Banjo - my favourite water rat.

Banjo – my favourite water rat.