Sweet Carolina… a Mood Fabrics silk metallic brocade three-piece

I know… it’s been awhile! 

I’m having a weekend ‘up north’ with Busy Lizzie… potentially shopping for shoes, buying fabric (who me??) or eating ‘high tea’.

After a bout of sensible sewing & lots of knit fabrics, followed by a bit of blog & sewing silence, I’m back with some very extravagant fabric, courtesy of Mood Fabrics, New York.


These pictures were very difficult to take. We have had a lot of rain… and when it clears it is soooooo hot & muggy. It was 30 degrees celcius and very humid…. and it was 4.30pm! Despite being lined, every item of clothing kept clinging to my skin. Fortunately this was not made with outdoor leisure in mind! I prefer to take all my shots outside as 1) natural light is kind, 2) the family happy snap camera doesn’t like playing nice inside, 3) my hometown is pretty & 4) I’m not big on putting my house on the blog – a bit precious I know but that’s me.

I confess I’ve had this fabric for months and the indecisiveness nearly destroyed me. It was so different to anything I had sewn previously and I was a little stumped… and terrified. 2.5m of Carolina Herrera silk metallic brocade from Mood Fabrics NY!  


The flowers are enormous… and the fabric shifts quite dramatically between light & dark.

So I spent lots of time draping a fabric over my dressform, wrapping about myself, sewing some small swatches and ironing them helps me better understand what type of garment the fabric might suit best. Then I bombard my sewing friends (thank you in particular to Lizzie, Jen and Susan for their advice) and the instagram peeps!

When I google Carina Herrerra there was an abundance of cocktail dresses, with fitted bodices and full skirts. I think this would be grand… but overwhelm my frame. This fabric would make a stunning sheath dress – which I own rather a lot of as it’s my typical work dress style – they often pop up in my Instagram feed.

I nearly made a Pauline Alice Quart Coat.  It would have been perfect… the fabric does crease beautifully into pleats… however I faltered at the last step and suddenly changed my mind. 


Due to the body of the fabric and the structural way it fell, I was haunted by the urge to make a cropped flared jacket that emphasised the body of the fabric. I finally settled on Vogue 8145


This was one of my very early pattern purchases, I’ve long adored the flared back of the jacket.This pattern is an unlined jacket. As the fabric is somewhat coarse in texture I used a lining from the stash. I underlined the body of the jacket and lined the sleeves. I used a bias tape to turn up the hem to minimise bulk.  


The sleeves are two piece raglan sleeves with a seam running down the top of the arm which provides some shaping.

I omitted the buttons as it felt ‘busy enough’. I also eliminated the centre back seam in the jacket body piece.

Once the jacket was complete… another bout of indecisiveness followed… should I make a long pencil skirt or a mini skirt? 

So I took the very practical approach of wrapping myself in fabric and the was very apparent that a long fitted skirt would be a nice counter balance to the very dramatic flared jacket. 


It was very tempting to indulge in a new pattern and I nearly gave in and purchased the Sew Over It Ultimate Pencil Skirt. In a rare bout of self restraint I decided to defer to my pattern stash. I really loved the fit of the By Hand London Pencil Skirt – which I had made and blogged way back in 2012.

I lined the skirt with more stash lining and added a walking vent (yes, a lined walking vent no less!) following A Fashionable Stitch tutorials. You can learn how to draft the walking vent here and how to line a skirt with a vent here. Thanks Sunni!

While this skirt pattern calls for fabric with some stretch, the long walking vent makes it easy to walk in – I do have a huge stride (fast walker!) so I’m slightly limited – probably walking in a more ladylike fashion. I actually adore the firmness of the fabric. It feels amazing to wear and I find the high waist is very comfortable. 

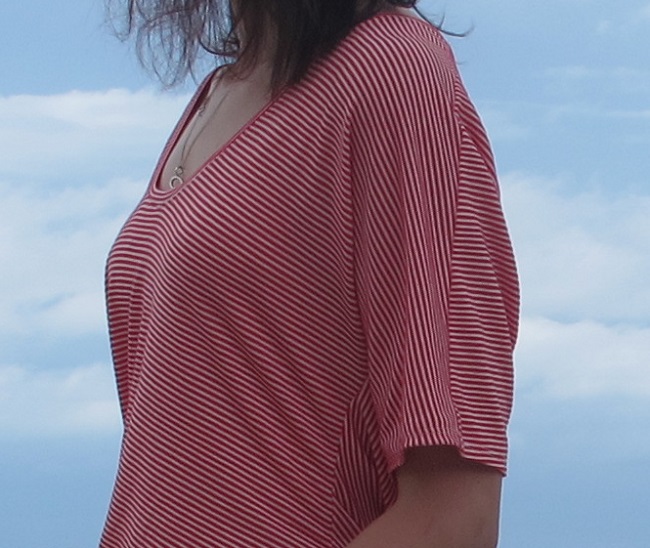
The top is a Burda 2964. I had this in my stash as well! I picked this up at a Spotlight sale as, despite the rather gawky pattern envelope art, I loved the square neck and princess seamlines. The top is cropped and I think the shapely yet slightly boxy fit suits the fabric and works beautifully with the high-waisted skirt. The top is a slight miracle of pattern cutting Tetris – I wiggled and jiggled the pieces onto the scraps of my brocade.

The pattern is unlined, features a side zip and slits in the seamlines. It also comes with long or short sleeves and in a longer length.
 

THE FABRIC  

This fabric freaked me out for a while as it was so unfamiliar. However… I’ve fallen in love with silk brocade and would now love a sheath dress! The fabric is just fabulous to wear.

The oversized print is spectacular of this particular Caroline Herrarra fabric is a unique blend of opulent and grunge. It does amazing things in different lights and settings. It’s just gorgeous. I’m never 100% comfortable in ‘pretty’ things however this rather masculine yet feminine blend of colour, print and texture is very appealing to me. 

I’d read much about the frantic fraying nature of brocade but didn’t find this fabric at all troublesome. In fact it was one of the easiest fabrics I’ve ever worked with. That’s not to say it doesn’t fray but it wasn’t shedding like a beast. 

I would advise lining this fabric.

Slip stitching the fabric is a joy as the stitches just seem to disappear. 

The colours of the fabric change quite dramatically – in the first image the fabric looks quite dark & moody. The light is behind me. The other pictures the sunlight is shining onto me, bringing out the yellow gold tones.

I doubt that I would wear all three items together… then again you never know! I do love to dress OTT sometimes, it’s fun! I’ve purchased several suits in my career and usually only wear the pieces together at the most formal corporate occasions. I prefer to mix and match. I love wearing jackets with skinny jeans and heels to more casual events such as dinner and drinks with friends. I also think I will wear the skirt with heels and a loose fitting shirt tied at my waist. 

Fabric: Caroline Herrara Silk Metallic Brocade, supplied by Mood Fabrics as part of my participation in the Mood Sewing Network. All opinions are my own. 

Pattern, Jacket: Vogue 8146 from the stash 

Pattern, Skirt: Charlotte Skirt from By Hand London (this pattern was sent to me in 2012 by the girls. Previously blogged and loved here.  All opinions my own). I’ve modified this pattern by adding a walking vent to the back and adding lining. 

Pattern, Top: Burda 2964 from the stash 

The Quart Coat will happen sooner or later… it’s just a matter of time & fabric…

I love sewing with Mood Fabrics, I’ve tried so many new things – anything you’d like me to try next – fabric or garment?

Simplicity 1463 & WIPs…

Yes, I’m bored of my tshirts too – however I tweeted I was making this… there was interest… so here it is! Evening light was fading fast – we photographed this top, this top and these tops at the same time. I made them to wear with shorts, skirts and jeans so I just snapped them all at the same time, this is how I wear them – everyday casual wear.

Simplicity 1463, View A. Front View Simplicity 1463, View A. Front View. Bit fuzzy – sorry!

I’ve made Simplicity View A – the least fancy – and I like it. It’s comfortable & easy to wear. I know… it’s a complete mimic of the pattern cover. I wanted a neutral top & this was ‘in the stash’. I do want to try View B in a deep blue DKNY lyocell I have waiting.

Simplicity 1463 - Pattern cover Simplicity 1463 – Pattern cover

After the Simplicity 1589 top and the masses of ease, I decided to make the smallest size. While the fit of the top wasn’t too bad, I found the sleeves too snug. Fortunately my daughter Giselle loved it. It’s too big for her but she loves it anyway… she even wore it to Santa photos. That’s her wearing it on the right… I know lovely fabric (remanent bin find at Spotlight, rayon knit)

Giselle is on the right wearing Simplicity 1463 Giselle is on the right wearing Simplicity 1463.
Is that the smallest Santa in the history of Santas???

There’s not much to tell you…

SLEEVES

As mentioned above, I found the sleeves snug so be aware that if your fabric doesn’t have much stretch that may impact on ‘sleeve snugness’. The other thing that I have found just a little annoying is the sleeve sits in just around the nook of my elbow. So after I’ve been wearing it for several hours I get ‘wear creases’ in my elbow and they don’t drop out and it bothers me… I know that’s a bit OCD of me but the strangest things annoy me – perhaps that’s why I got a deportment badge at school?! I generally only dress sloppy when I drive long distances, my car isn’t very judgemental…

If you like stripe-matching…

Simplicity 1463, View A. Side view Simplicity 1463, View A. Side view

My fabric is quite lightweight but does not stretch much so I found fitting the sleeves to the top slightly fiddly as my sleeves were difficult to stretch to fit the top. I just pinned/eased the pieces and with patience I got them in neatly. If your fabric is lightweight it makes it slightly more fiddly as the sleeves are sewn as a doubled over tube so there are three raw edges to think about when attaching the sleeves to the top. You might perhaps like to overlock the raw edges of the sleeves together before attaching them to the top. The good news is: no sleeve hems!

NECKBAND & HEMS

The neckband is two pieces. I attached this with the overlocker & used my Bernina to stitch around the neckline to hold the binding seam in place. I like the scoop in the neck, it’s enough but not too much.

I finished my hem with my coverstitch machine. I have a Janome CoverPro 1000 & I’m glad I have done several knit projects in a row as I’m becoming more confident with multiple uses.

Simplicity 1463, View A. Back View Simplicity 1463, View A. Back view

It has a high-lo hem but it’s not exaggerated, it’s a gentle swoop rather than a massive leap from front hem to back hem. The front is also a generous length which I really like.

THOUGHTS?

Just mind the snug sleeves & due to the size of the top I would think it’s best sewn in a lighter weight knit but that could be just my preference. It’s rumored I’m into draped styles.

It’s loose fitting without drowning you and I think the length/hem shape is flattering.

Once you get used to sewing knits, tshirts are a fun project. I had not sewn many knits in my first couple of years of garment sewing. The Drape Drape books made me take a leap & challenge myself. I’m glad I did.

Fabric: a mystery knit from the Spotlight bargain table. $3 a metre.
Pattern: Simplicity 1463


IN THE WORKS…
I haven’t sewn in my sewing room since New Year. I’m back at work. Work is all consuming for a while & my brain feels like Swiss cheese at the end of the day. I suspect I’ll be a bit a preoccupied for a couple of months. I cancelled my 2.5 weeks holiday this January and therefore also the Tasmania holiday. That’s life, just means holidays later this year instead. So I’ll sew at night instead… I know, surprised?

Alabama Chanin: I’ve just hand sewn the funniest Alabama Chanin test tank with different seams, threads, stitches – so I could see what I like and what I needed to consider before leaping into hours and hours of hand work. It’s mistake ridden – which was the point of the exercise. I now know what works and doesn’t!
I’ve been fascinated by this for ages… and it was on my Wish List for Christmas and my sister-in-law gave it to me… so now I’m indulging myself with hand sewing, something I used to do a lot of. I’m loving it.

In the name of sewing... excuse the selfies, blue bra etc... I was excited In the name of sewing… excuse the selfies, blue bra etc… I was excited late at night when I finished HAND sewing this. The armhole error has nothing to do with the stitch used – it’s to do with how I attached the binding. I also figured out my neckline problem.

Edith: I have a new addition to my sewing room, she’s a sweet little lady and you will meet her soon!

My latest little friend... My latest little friend…

Ziggi: I have embarked on the epic Style Arc Ziggi Jacket. Wish me luck!

Style Arc Ziggi Jacket - 48 page PDF. No, it wasn't fun, Style Arc Ziggi Jacket – 48 page PDF. No, it wasn’t fun.


Stripe play: Grainline Hemlock and more Drape Drape

This all started with the intended purchase of 1.4 metres of striped cotton jersey from The Fabric Store, Brisbane. Then they offered me the rest of the roll for half price. So I left with 3 metres instead – what’s a girl to do?

I wanted a classic long-sleeved t-shirt. Big & slouchy. I tossed up between the Tessuti Mandy Boat Tee & the Grainline Hemlock (both free). I chose the Hemlock.

Grainline Hemlock. Neck binding has been cut on the bias.

Grainline Hemlock. Neck binding has been cut on the bias.

Why? The finished bust measurements of the Grainline Hemlock is 44.5 inches and the Tessuti Mandy Boat tee is 58 inches. Even though I wanted a big t-shirt, 12.5 inches of ease felt like enough – 26 inches with the Mandy Tee seemed a bit excessive with this jersey.

What can I say – this is an easy t-shirt to make. This is a one size pattern and on me it’s very loose. Some days that’s exactly what I want to wear. I’m a huge fan of loose tops paired with fitted skirts and jeans so this fits into the my casual wardrobe nicely.

Grainline Hemlock

Grainline Hemlock. Back view. I keep rolling up the sleeves as they are long and loose. To be honest, I push up all my sleeves!

I decided to cut the neck binding on the bias just for fun. I know, crazy times.

All seams sewn with my overlocker. Hems completed on my coverstitch. I only used my Bernina for the extra line of stitching around the neckline to hold the neck binding seam in place.

Grainline Hemlock

Grainline Hemlock. Stripe matching not too shabby. Sleeves down.

I’d recommend this pattern if you are after a generic t-shirt. It’s easy to put together and there is an online tutorial if you need it. Perhaps it might be a nice introduction to sewing with knits if they have been daunting.

For my second t-shirt I decided to make a draped garment where the stripes were anything but regular. I also didn’t want two shirts more or less exactly the same – the obviously choice was my favourite draped t-shirt pattern from Drape Drape 2.

Drape Drape 2, Number 4. The pattern piece has been flipped over to run the stripes downwards on the front.

Drape Drape 2, Number 4. The pattern piece has been flipped over the run the stripes downwards on the front.

Drape Drape 2, Number 4

Drape Drape 2, Number 4. More stripe (not) matching

I had been a little disappointed that the stripes on the front of the drunk candy cane t-shirt had been so horizontal/normal on the front, whereas the back was more visually interesting with the stripes running down and into the drape.

Red stripe and blue stripe Drape Drape 2 No.4 shirts.

Red stripe and blue stripe Drape Drape 2 No.4 shirts.

So I flipped the pattern piece over, placing the drape on the other side & making the stripes on the front more of a feature. I also cut the neckline slightly higher so it wasn’t in danger of being indecent.

Drape Drape 2, Number 4. Back View

Drape Drape 2, Number 4. Back View

What’s the point of all this? Nothing much, it was just fun. Sometimes I just sew to explore ideas… and fortunately I end up with a wearable garment. Bonus.

Grainline Hemlock and Drape Drape2, No.4

Grainline Hemlock and Drape Drape2, No.4

More sewing… I’ve got another Grainline Alder (View B – #teambumruffle version – see Funkbunny if that hashtag makes no sense) and a Simplicity 1463, View A to share here soon! I’m back to work on Monday so my sporadic sewing and blogging will resume shortly!

Blogging, writing, thinking…
I like writing as much as I like sewing – but I enjoy writing about more things than sewing (shock, horror). The writing, re-writing and editing process helps me think about things more objectively and explore ideas. Sometimes I feel the urge to write about life. Or put down stories, scenes and ideas that run through my head. However that’s not going to happen here, it will be somewhere else on a private blog just for me – when the urge strikes or time permits. Selfish writing 🙂

A drunk Candy Cane draped t-shirt… and goodbye 2014…

I decided to make a draped garment for Christmas Day… I know. Not surprised?

Drape Drape 2, Number 4. Back/side view.

Drape Drape 2, Number 4. Back/side view.

I had planned a ‘drunk candy’ draped tank dress (plenty of room of Christmas lunch). I loved the idea of messing with the ubiquitous candy canes at this time of year. However the only red striped knit I could find was a much finer stripe than I wanted to get the right look. So I decided to make a t-shirt instead – and settled on Drape Drape 2, Number 4 – previously blogged here.

Note: I didn’t get drunk on Christmas Day. In fact I very rarely get drunk, tipsy is about as exciting as I get.

Drape Drape 2, Number 4. Front view

Drape Drape 2, Number 4. Front view

Drape Drape 2, Number 4. Back View

Drape Drape 2, Number 4. Back View

This is such a simple t-shirt to make, one piece for the body & one piece for the neck. It took less than an hour to sew up – with sleeves & the hem finished on my coverstitch machine (a beast I am slowly taming & learning to love).

Construction tips: The neckline on this is huge – this is a Japanese S/M size and I tend to pull it backwards so it’s not indecently low. I’d also say if you are stripe-matching junkie – this is not for you. You just have to surrender to the crazy for this one.

Drape Drape 2, Number 4. Draped sleeve stripes - 'not' matching.

Drape Drape 2, Number 4. Draped sleeve stripes – ‘not’ matching.

Drape Drape 2, Number 4. 'Straight' sleeve stripes - 'not' matching.

Drape Drape 2, Number 4. ‘Straight’ sleeve stripes – ‘not’ matching.

We took the above photos post-Christmas in the first break in the rain (it’s been stinking hot and sunny ever since of course). On Christmas Day I looked so exhausted and I was – I slept for four hours during Christmas Day. I’m so glad that the offices are closed and I have 11 days to rest.

I can't ever remember being this tired on Christmas Day

Christmas Day – I can’t ever remember being this tired on Christmas Day 😦

So ends 2014…

I’m not a New Year type. I think I will wake up tomorrow and be the same person, in the same life. I guess that sounds cynical – but it’s also reality.

The last 12 months weren’t what I expected this time last year. Everything changes over time, that’s how life is – for the better and worse. People come into your life, some people leave. People may add to your life – others might just subtract. There are challenges and triumphs. Joys and sadness. You have memories to treasure and those memories you wish you didn’t have. Today I remembered a poem my mother once wrote in a book for me…

Life is mostly froth and bubble,
Two things stand like stone,
Kindness in another’s trouble,
Courage in your own.
from Ye Wearie Wayfarer by Adam Lindsay Gordon (1833 – 1870)

That all sounds glummer than it should. It’s not meant to. I’m generally a positive person. I like to laugh. I like happiness. It’s a good way to live.

May your days be filled happiness – and on the not-so-good days – with kindness and courage.

Pattern: Drape Drape 2, Number 4.
Fabric: Cotton/polyester knit from The Fabric Store, Brisbane

Simplicity 1589 – a polka dot peekaboo top!

I’ve been churning out tops recently. I had a lack of ‘summer separates’ so I decided to take action – amazing! Practical sewing by me!

To start off the sewing binge, I made Simplicity 1589 – a ‘learn to sew’ pattern.

Simplicity 1589, view A

Simplicity 1589, view A. Our Christmas weather has been rubbish – so much rain!

I had always been drawn to the peekaboo and lapped backs of this pattern – so when a pattern sale came along, I decided to buy it. I don’t particularly mind whether a pattern is advanced or easy – if it works, it works. I also love that this pattern is a fabric miser.

Simplicity 1589

Simplicity 1589

I made this with less than a metre of fabric – left over from my first Grainline Alder (Jillian of Sew Unravelled… you were so right about not making a belt for the Alder – the fabric was perfect for a top). It’s a woven rayon – I love rayon, it straddles the divide of man-made and natural fibres. It’s perfect for my climate.

View A, which I have made here, takes just 90cm of 150cm wide fabric (or 1 yard at 60 inches wide) so it’s an absolute stash buster. View B takes slightly more 1.3m of 150cm wide fabric (or 1 3/8 yard at 60 inches wide).

These are easy, easy tops to make. If you are looking for a nice woven top pattern with a difference – then this might be an option. I also suspect it is a great option for fabric busting all those smaller pieces from bigger projects.

The armholes and neckline are finished with bias binding. I confess I do struggle to get my bias binding as neat as I would like – but it’s a challenge I’ll continue to embrace.

Simplicity 1589 - front view

Simplicity 1589 – front view

There are no bust darts. I suspect some may find the fabric in this top falls like a waterfall… I wouldn’t know and I don’t speak for FBA department of the sewing community – but if you have knowledge/advice to share, please comment below for others. What I can say is that it works for me. The side panels and back also cover up most bra straps which is a nice feature.

Due to the lack of bust darts I personally think a fabric with some drape will work best – otherwise it may be a little tentlike.

I made a size 4 – this top has A LOT of ease. About 5 inches of ease at the bust – which I just think is too much, even for a loose fitting top. If I had made this according to the sizing chart, I would have made size 8 – which would have been two more inches of ease than this one on me. I like the fit of this. The armholes are comfortable and the back sits nicely.

Simplicity 1589 - back view

Simplicity 1589 – back view

If you get stuck with what size to make, check the finished bust measurements at the bottom of the envelope back – put a tape measure around you and figure out how much ease seems reasonable. I do this with almost every make. This top isn’t meant to be tight or close fitting but I don’t think you need to swim in fabric either.

I also think this would be a nice pattern for teenagers. It is loose but has cute details that I think would appeal to many young girls I know. My daughters are too slight for this pattern at the moment although I think many of their friends would love it.

I absolutely struggled with my stitching with this make… the tension was all over the place and I could not for the life of me figure out why. It was funny that it happened on this make as it was supposed to be ‘easy’! As it turned out, a drunk monkey (or a small daughter) had fiddled with my machine tension at some point – it didn’t occur to me to check the tension dial because I hadn’t touched it. I thought it was a bobbin case screw issue which has happened once before. Oh well. At least I know not to make the assumption that no one else touches my machines 🙂

Once I found the source of my stitching woes, I unpicked the topstitching at the armholes and neckline then restitched the topstitching. It was too late for the back neck and side panels… thankfully the tension issues only shows on the inside – and it’s not that bad (suck it up Princess Lizzy).

Simplicity 1589 - side view

Simplicity 1589 – side view

I briefly considered throwing this out or not blogging it for a bunch of reasons… but it’s escaped the charity bag and made it to the blog.

To hell with imperfection.

Pattern: Simplicity 1589
Fabric: Rayon from Spotlight. I picked some more up at the 40% sale the other day to make a little dress for my youngest daughter.
Skirt: Target – I found this in the kids sale section for $10. It’s a bit ‘out there’ but I love it – I have a weakness for anything denim, especially skirts. It looks fab dressed up with a white shirt and heels. Plus I think it would be fun to copy the spray paint concept on a future make.