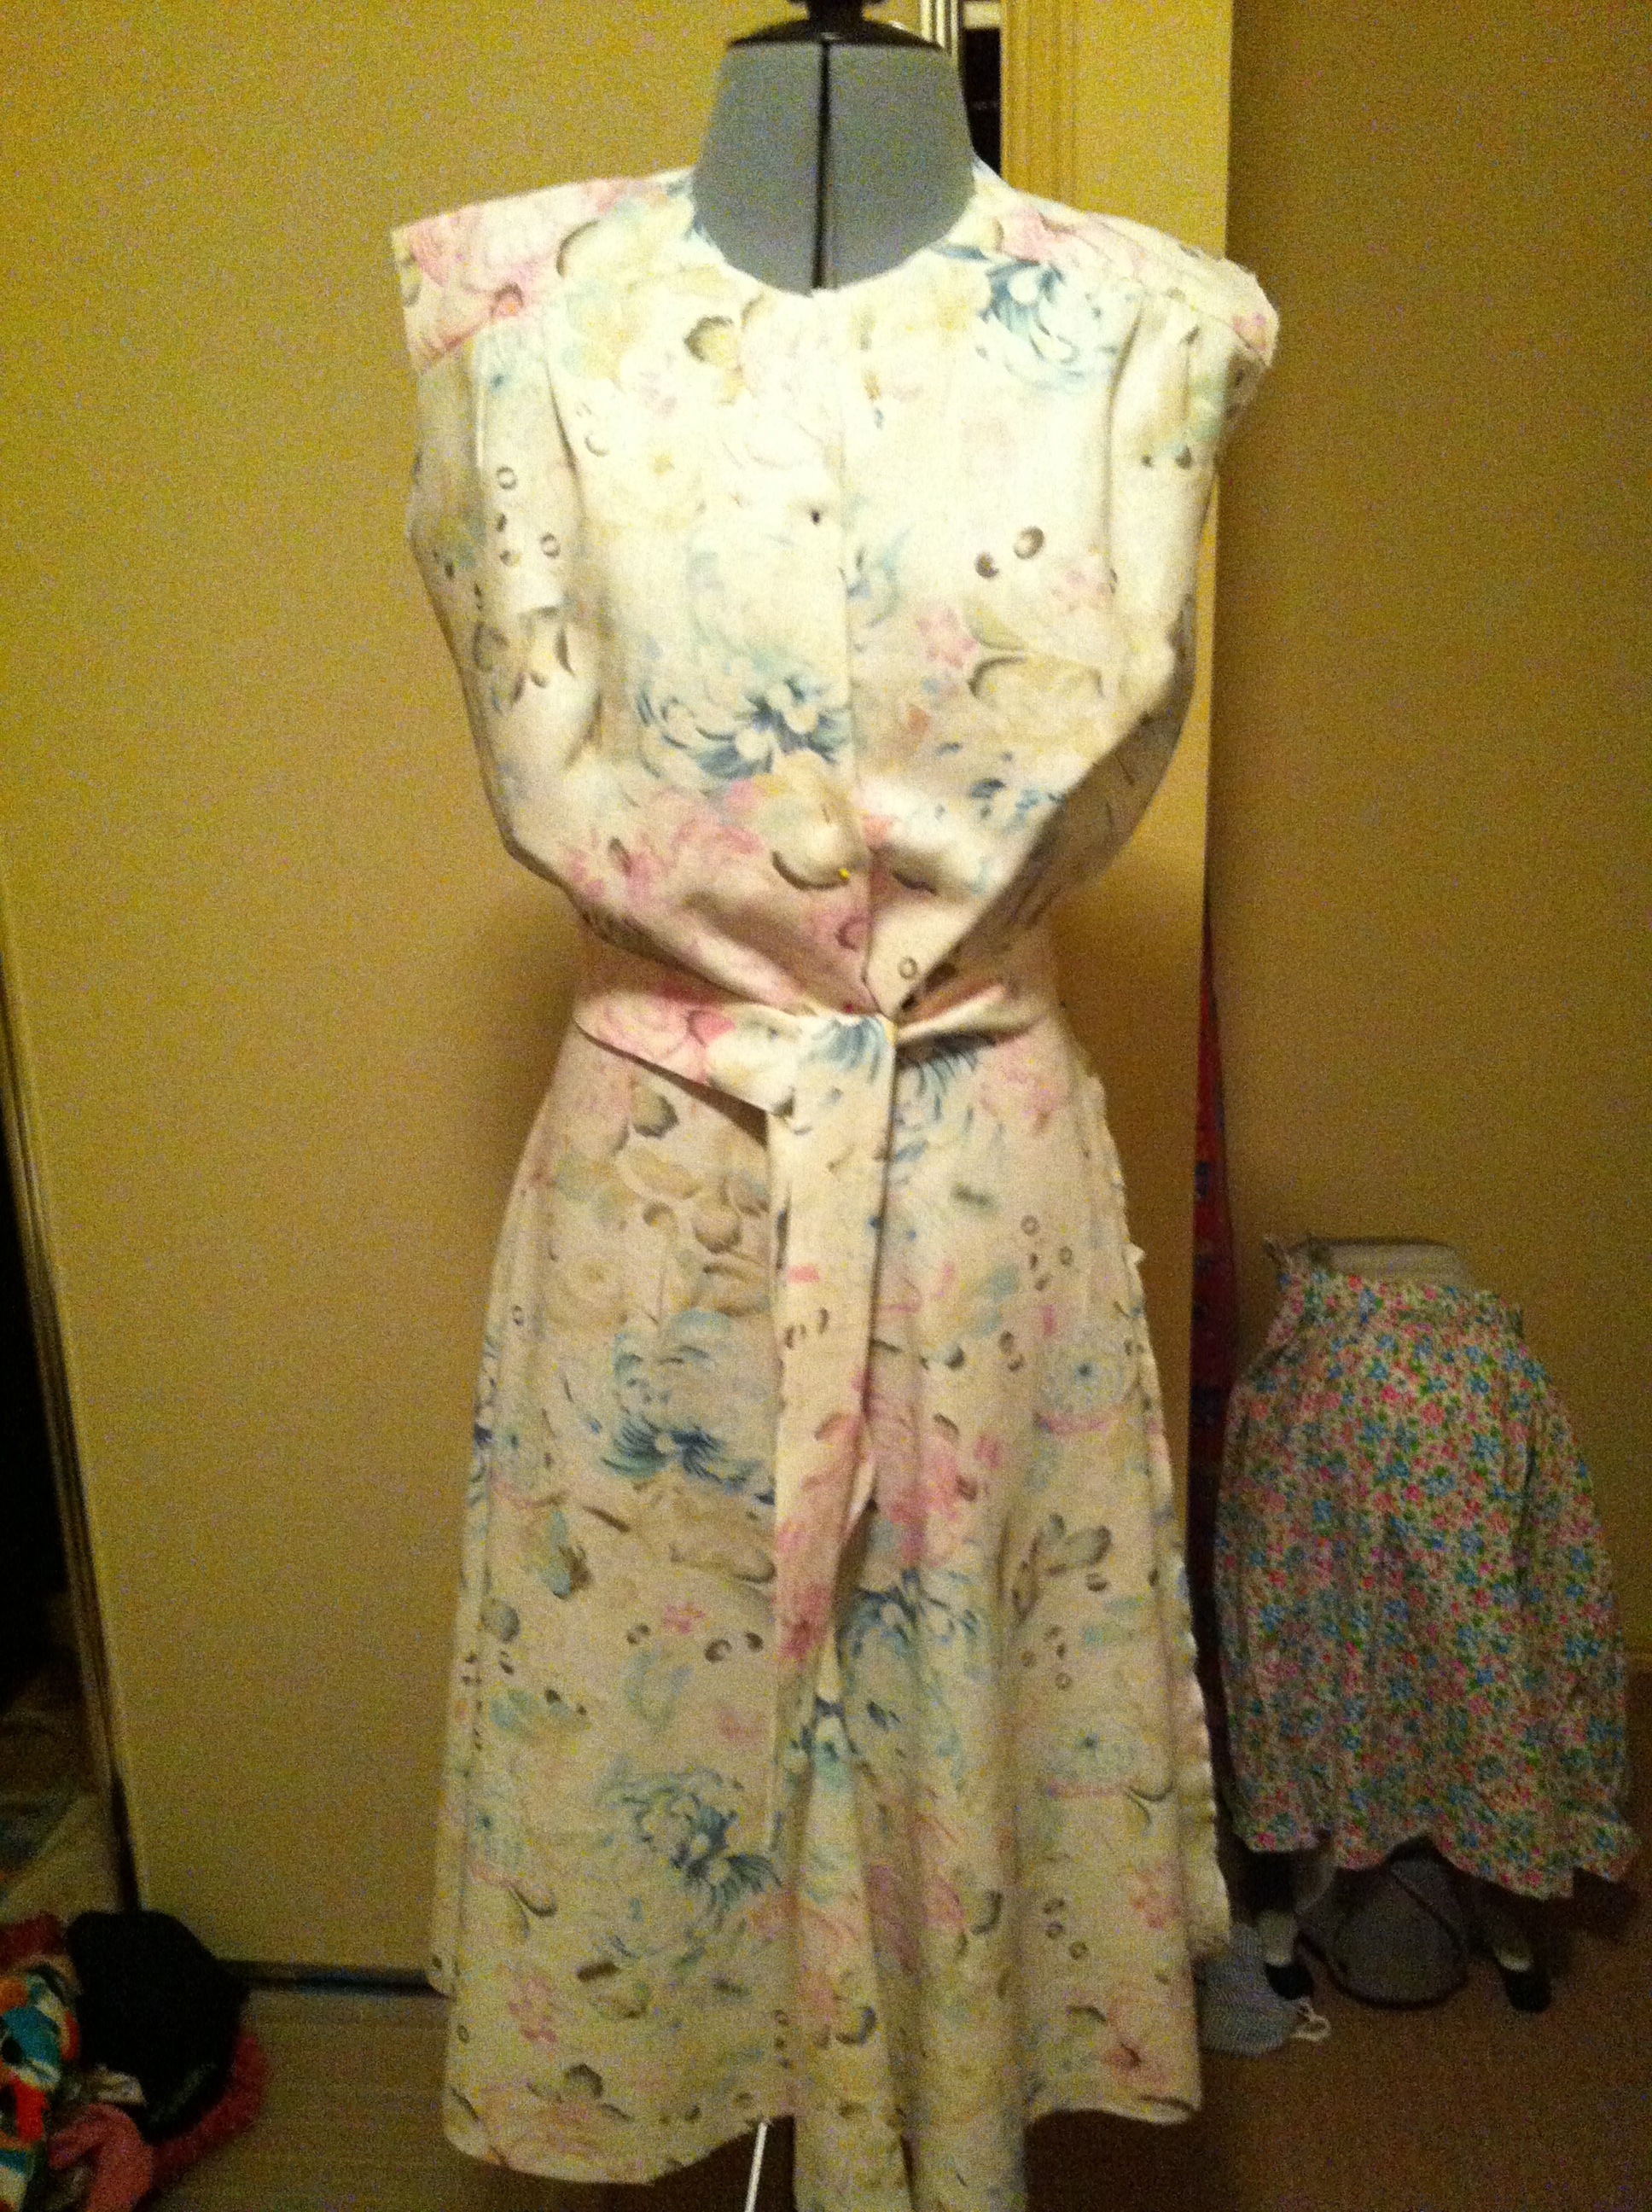
Simplicity 1880 shirt dress – windswept and finished! Material: printed linen from Lincraft.
I’ve been a bit absent from my Sew Busy Lizzy blog. It’s been frustrating but sometimes you just can’t do everything. In the last week I was lucky enough to be featured on Tilly & the Buttons for my teapot picnic blanket skirt and also for my Sewaholic Thurlow WIP on didyoumakethat’s great new post about WIP and people trying to guess what they are. So visits and comments have been ticking over while I have been otherwise occupied taking children to Sydney, museums, dance shows, libraries and more!
I’ve nearly finished my first Sewaholic Renfrew but will show you later this week 🙂
This week’s sewing news is I’ve finally reached the end of the road for A Fashionable Stitch’s Simplicity 1880 Sewalong.
SIMPLICITY 1880 SEWALONG WITH SUNNI
As you know I committed to sewing along with the 2-in-1 Shirt Dress Sewalong with Sunni @ A Fashionable Stitch. I’ve really enjoyed the experience. While I love to pick my own patterns and ‘do my own thing’ being part of this sewalong has shown me new ways to do things and taken me outside my comfort zone. That’s a good thing.
I’ve also enjoyed the community feeling of this project, posting in the Flickr group, posting questions at A Fashionable Stitch and being part of something bigger than me and my Bernina. That’s really why I started blogging after all – to have conversations!
FUNNY STORY ABOUT THIS PROJECT FABRIC
I was going to make this fabric out of a rose print rayon cotton. Unexpectedly I was in Sydney CBD for work and popped into Lincraft on my way to the airport. I discovered this printed linen at 30% off. I picked out some matching trim and buttons and trotted off to the counter. They measured out my trim, counted out my buttons and then unrolled the linen. Disaster – there was barely 2 metres. Distracted by numerous beeping text messages from work on my phone, I told the sale assistant not to worry. I purchased the buttons/trim and left. While standing on the pavement outside and replying to all my work text messages, I looked down and realised I was clutching trim and buttons for a fabric which I had not purchased! Ridiculous. I have no plans to make the Emperor’s New Clothes so I marched back in and said ‘I’ll risk it’. She looked somewhat bemused as she had just finished rolling the fabric back onto the roll. Oops.
I did manage to squeeze the dress out of barely two metres. I could not make the full tie belt. I just cut the longest piece available from the bits and pieces leftover once I got the dress itself cut out.
THINGS I LEARNT (OR CONQUERED!)
- How to attach a collar.

Simplicity 1880 shirt dress: inner collar seam bound
I had never done this so was rather chuffed when it all came together so beautifully – thank you Sunni for some great step-by-step collar instructions. I’m quite sure I would have been knocking on my mother’s door without them. I did wish I had stay-stitched the upper collar as it was all kinds of huge compared to the under collar piece which I had interfaced. I panicked but then used the under collar as my stitching guide and that ploys seems to have worked. I also used bias binding to neaten the collar seam. Hopefully I will get neater with this method!
- Insert a sleeve in a different way.

Simplicity 1880 shirt dress: inner sleeve seam bound with bias binding
Usually I would have sewn the bodice side seam and the sleeve seam and then inserted the sleeve – which always involves lots of jiggling and wiggling and twisting to get it through the machine. Instead Sunni provided a great set of sleeve instructions and links to insert most of the sleeve flat and then sew up the bodice side seam and the sleeve seam. So much easier and I got two perfect sleeves with no puckering or unpicking!
- Sew the skirt first and leave it to hang/stretch while you make the bodice – rather than doing it last as per the instructions.
- Go slow (sometimes!). I enjoyed doing this project as the posts went up. It halted my usual sewing frenzy and provided some structure.
- Try something different. I probably would not have bought this pattern however I’m glad it’s in the stash. I would like to make the wrap dress now!
- Gold never tarnishes. I took the finished dress to show my mother. She immediately said ‘a shirt maker dress! Does it have a zip in the side seam as well? That’s exactly what I made when I was learning dressmaking! I love it!’.


WEIRD THINGS I DID
- Press my gathers before stitching.I often get a little cross at gathers as they don’t always feed through nicely, the gathers can shift and become uneven. So once I was happy with my bodice gathers… I pressed them flat and then sewed the yoke on. I found this worked beautifully. The gathers are very even as they were pressed into their ‘proper place’ and stitching was easy-peasy.

Gathers, trim and beads!
- Beading to add interest.I stitched beads to the centre of the flowers. The print is quite big and random so they are quite scattered. I’m not very good at wearing fussy details so I like that you only see the beads if you are ‘looking’. I also choose to randomly bead only the bodice (not the skirt) as I’ve seen this done on designer dresses.

Collar, trim and beads
- Trim to define a design. I stitched a trim onto the collar and the bodice. I’m really glad I did this, it provides definition to the design and saves the dress from descending into bland pastellness – I’m sure that’s a word… I do love to hand stitch and enjoyed every minute of the trimming.


CONFESSION TIME
Forgive me bloggers, as I lost my way a little… I really started to panic sewing this dress. Usually I fall more in love with a project as I sew. This project was the opposite. The more I stitched, the more disenchanted I became. I enjoyed every minute of the sewing process but as the dress emerged from the pile of fabric, I wasnt’ sure I ‘liked it’.
The dress just did not feel like ‘me’. The combination of pretty pastels and a very ladylike floral was not my usual territory. I felt it looked matronly and a bit Queen Mum. We all want to look as fabulous asthe ever-stylish Kate Middleton and I felt like I was veering off into old lady territory – at least the late Queen Mum liked quality champers and I can relate to that – I thought I needed some to drown my sorrows.
However looking at the pictures we took at the lookout this afternoon I’m starting to think it’s a pretty dress after all. Not as old and fuddy-duddy as I thought. I think it’s growing on me. Not like fungus, more like petunias. Perhaps I am a pastel princess after all…
I would like to make this dress again. In a black swiss dot with white piping and buttons – and lengthen the bodice about an inch. I think that would look scrumptious!
Here are some more images of the Pastel Princess… the tie belt is a bit puny – do you think I should ditch it?

Finished Simplicity 1880 shirt dress with belt

Finished Simplicity 1880 shirt dress without belt

Simplicity 1880 shirt dress front. Just had to share this one I told my husband to just take a picture of the dress front not thinking my head was going to be in it. Check out my weirdly huge head and a red AND an orange eye. WTF??

Simplicity 1880 shirt dress. At Tacking Point Lighthouse – all those people on the hill are looking the other way at migrating whales!!
Thanks Sunni! 🙂
Could just be me – but this flared skirt business is rather a ‘hip’ highlighter??