Ogden Cami Dress

A quick holiday post, from the spectacular Bruny Island, Tasmania, Australia.

I wasn't 'in love' with this fabric when I purchased it, just its drape. Now it's sewn up I rather love the print

I wasn’t ‘in love’ with this fabric when I purchased it, just its drape. Now it’s sewn up I rather love the print

I suspect the True Bias Ogden Cami may be a popular Australian summer sewing pattern with many. I think the sleeveless, casual style & being a pattern for ‘wovens’ makes it perfect for steamy summer days.

This is just another experiment for yet another Ogden Cami Dress ‘hack’ that have been topping up everywhere. Far from perfect but I’ve worn it a few times already, so perhaps a success anyway!

I use the term ‘hack’ loosely. No pattern drafting going on here.

I simply extended the Ogden Cami hemline, flaring it out about 1/2inch on either side from about 1 inch below the armhole.

Odgen Cami Dress

Odgen Cami Dress

I flared the lining piece at the sides I don’t think I would I worry about this modification next time as the cinching in of the waist achieve that soft overlay flare anyway.

I attached the lining to the outside of the cami bodice rather than the inside, treating it like an overlay rather than a lining.

I decided where I wanted my waistline to be and allowed for a slight blouson effect.

Odgen Cami Dress

Odgen Cami Dress

To create the waistline, I attached bias tape to the inside of the dress. I first stitched along the inside of the bias tape, along the fold line. I pressed it downwards and edge stitched along the other edge of the bias tape.

Ogden Cami dress - internal - waist elasticity casing & hem.

Ogden Cami dress – internal – waist elasticity casing & hem.

I left a stitching gap and then threaded some 1/4in elastic into the bias tape channel.

I turned up the overlay and dress hemlines with more bias tape – and hand stitched the hems in place.

Nothing fancy but it’s quite a cute little dress for summer.

Pattern: True Bias Ogden Cami, modified

Fabric: rayon/linen blend fabric on Lincraft

Location: water shots at Jetty Beach on route to the Cape Bruny Lighthouse, Tasmania. An incredible day in an amazing place in the world. Not overly ‘touristy’ just divinely beautiful, unspoilt & the journey ‘off the beaten track’ is well worth the effort.

2017 – a year of random sewing

… or why I don’t have sewing goals…

It’s that time of the year when most of us focus on what we would like to do for the coming year – in all areas of our lives. I’ve been thinking a lot about a lot of things lately – which in part prompted the sewing room de-stash and reorganisation (let’s not discuss the horrendous mess it had become lol).

It was during The Great Sewing Room Clean Up that I found a postcard I had purchased in Madrid. It says simply “the chief enemy of creativity is good sense” Pablo Picasso. It got me thinking and I’ve hung it on my peg board.


As a general rule I am a goal-orientated person. I can be fiercely competitive and work myself into the ground in order to defend a hockey goal, meet a work deadline/target or get my children to their various activities.

Despite my relentless drive I have little or no interest in setting myself sewing goals.

Perhaps this is because my motivation to sew isn’t often practical. I sew when a fabric inspires me… I am hit by the urge to try a pattern… I am suddenly obsessed with having a specific garment… all of these things and more. My motivation is primarily creative – not practical. 

For me, practical or goal-driven sewing can be stifling. Not inspiring.

So much of my life is consumed by work and family goals, commitments and requirements that I don’t want to be that person here. The blog, or my sewing room, is where those demands, or required behaviours to achieve them, don’t apply. It’s simply where I let things ‘happen’ and that for me is the great joy of sewing. 

I appreciate that’s not how it is for others but it’s how it is for me. So I’m embracing that rather than fighting it. It’s no better or worse than any other approach, it’s just my approach.

In 2017 I’ll simply embrace creativity and see where that takes me.

I will sew and blog when I feel the urge. 

I may sew fabrics from my stash. 

I may sew the jackets which I have traced and have fabric waiting for… but don’t hold your breath waiting for them. 

Tomorrow I may pat a fabric that demands to be made immediately into a dress. I’m OK with that.

No hashtags required. Just random sewing.

Right now I’m in beautiful Tasmania. No sewing just picking raspberries, counting echidnas and sleeping.


Happy New Year & a ‘new’ room

Hello & happy new year!

I’m still working my way through the backlog of 2016 posts but in the meantime I thought I’d quickly post what I’ve been up to…

Tidying up my sewing room!

I felt suffocated by commitments and responsibilities in 2016. I took on too much in 2016. I said ‘yes’ too many times when I should have said ‘no’. I felt obligated to help others, going out of my way to make time for people, even those who didn’t deserve or appreciate it – much less understand the pressure it caused. 2017 will be different.

While I’m figuring out how to get through 2017, I decided that I would tackle my ‘life junk’.

I started with my sewing room.

I’m not a ‘super mum’ and I loathe the term. I doubt there are any. I’m just another person trying to juggle too much, too often. It’s impossible to do everything all the time – although I do like to kid myself I can. Sometimes you manage to pull it all together… those are the good days…. sometimes you cry, you panic on route to the next kid pick-up, you lose your temper, your patience and everything else along the way… but life goes on regardless. That’s just life really.

I love to sew. It clears my head. However as 2016 proceeded to spin out of control and then run me over like a freight train, my time to sew dwindled dramatically and so did my time to tidy/clean etc – not just my sewing room but anything. Life became increasingly chaotic. Then it became difficult to sew because I felt overwhelmed by the ‘mess’ in my sewing room. And everywhere to be honest!

So on New Year’s Eve I decided it was now or never. I need to change some things in my life and it seemed the logical place to start… in my former ‘happy place’.

It may have been unbelieveably hot and humid but I didn’t let that deter me from my mission.

I got a filing cabinet for my patterns and a new desk for my machine and overlocker. My coverstitch sits atop my pattern storage as it is not used a frequently as the other machines.

My room now has a pegboard. My sewing reference books, Japanese pattern books, magazines, patterns and tools are neatly put away… and easy to locate.

My pattern storage, pegboard and book shelf.

My pattern storage, pegboard and book shelf. Lots more space on that board!

I have some lovely artwork (with kimono fabric in it!) above my machines. I have all my machine bits & pieces in neat storage cubes under my sewing desk. The ironing board nearby.

I have a gorgeous view and lots of natural light.

My machines, artwork and my lovely peaveful tree tops view.

My machines, artwork and my lovely peaceful tree tops view. This photo has come up soooo ‘yellow’ – the perils of indoor iPhone shots, sorry I don’t Photoshop my images, you get what you get and you don’t get upset! Plus upcoming projects waiting on my chair!

I pulled out all my fabric and all my patterns. I did a massive ‘de-stash’ and then reorganised the lot.

I vacuumed, I dusted, I sweated, I despaired, I swore, I kept on going. It felt good.

I’ve still got some more sorting and organising to do after my holiday but I feel much better. I also feel better equipped to deal with the year to come. I’ve reclaimed my ‘happy place’, somewhere to escape, relax and lose myself.

Wishing you a happy 2017 and that you also find your ‘happy place’, wherever that may be.

A dress: Vintage Vogue 8974…

Or when everything old is new again… (and a recent make!)

A floral vintage Vogue Patterns 8974

A floral vintage Vogue Patterns 8974

I’m not really a vintage gal. It doesn’t seem to fit with my casual aesthetic and I think it would be a little odd in my workwear wardrobe which tends to be quite modern and fitted.

However that doesn’t mean that I don’t appreciate it on others or have the odd craving for a bit of old-fashioned pretty. And not every interpretation of a vintage pattern needs to be ‘vintage’. Perhaps that is why I have been drawn to a couple of the Vintage Vogue re-issue patterns of late.

I’ve been looking for a dress pattern for three metres of gorgeous black bamboo linen I got at East Coast Fabric with Jen and Lizzie when I was in Brisbane in October.

I’m after a longline, sleek summer dress but with a striking design detail to relieve the severity of a lot of black fabric.

Amid my searching I came across Vogue 8974, a design from 1949. This hasn’t been made much (in Blogland at any rate), I suspect the need for a strapless bra and the a-line skirt (rather than a generous gathered or pleated skirt of the 1950s era) has let it loll in the back of the catalogue, waiting to be discovered.

Vogue 8974 pattern art - courtesy of Vogue Patterns

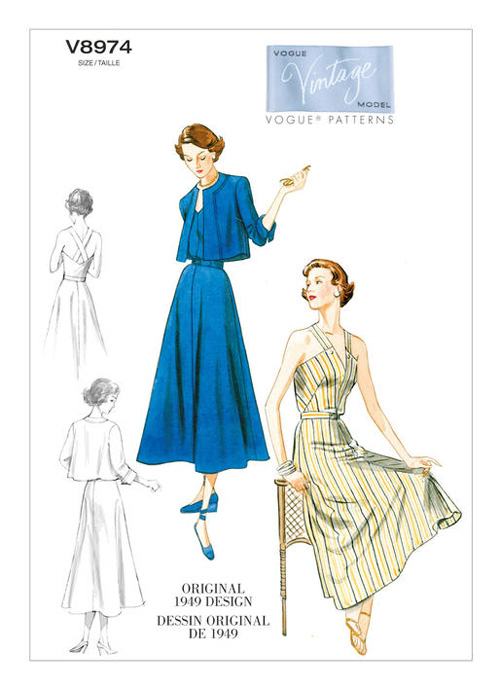
Vogue 8974 pattern art – courtesy of Vogue Patterns

I really love the jacket as well. I’m not really a matchy-matchy girl so I’ve just made the dress. I think the jacket would be a very cute project in the future!

CONSTRUCTION

It’s a relatively simple make. The pattern construction has a very cool snap closure at the side waist. While I loved the idea of this, I decided to replace it with a zip. I find dresses with side closures that don’t release all the way to the armhole incredibly difficult to pull off over my shoulders. I almost dislocate my shoulders getting them off. I don’t know if my shoulders are weirdly larger in comparison to my rib cage or it’s simply that I’m not the world’s greatest contortionist. Either way, I don’t enjoy clothes that require a can opener to get in and out of.

Vintage Vogue 8974

Vogue 8974 line art, courtesy of Vogue Patterns

I added a lining to the bodice as the linen is slightly sheer on the white areas of the print. I didn’t worry about lining the skirt as it hangs away from my body and I wanted to keep it light and airy as linen is so cool to wear in summer.

I think I could shorten the bust darts a little.

The front bodice neckline is a little fiddly to sew but pinning and patience gets you through. I often add a little length to a bodice, however I left this one as drafted and it seems to be the right length on me.

The bodice has lovely french darts and a marvelous neckline.

The pattern doesn’t direct you to interface the facing pieces for the bodice, which I thought was odd so I added this.

I omitted the buttons as I don’t think this fabric needs embellishment.

FIT

It’s a tricky one. I made the size 6. People talk about the Big 4 having too much ease etc etc. I’ve often seen people make certain sizes based on this theory and then have a disaster make.

Refer to the body measurements on the envelope by all means. I ALWAYS chose my size and grade between sizes based on the FINISHED measurements on the pattern paper. It’s always interesting to compare the envelope body measurements to the finished measurements and see how much ease they are allowing. I would recommend chosing your size based on the ease that you prefer. This may be more or less depending on the style of garment.

Vogue 8974 - side view

Vogue 8974 – side view

I sewed this up and was pretty happy with everything EXCEPT the bodice upper edge sat away from my body from my mid upper bust and around under my armpits. While it looked OK and my family couldn’t see what I thought was so odd… I felt like ‘bewbs in an icecream sundae glass’. That’s the best description I can come up with 🙂 You can still see some of this gaping at the side (see below) and I’m not 100% pleased with the fit above my bust either. Perhaps a firmer fabric would be less likely to crease above my bust. So maybe the bamboo linen is not destined to be a Vogue 8974. We will see.
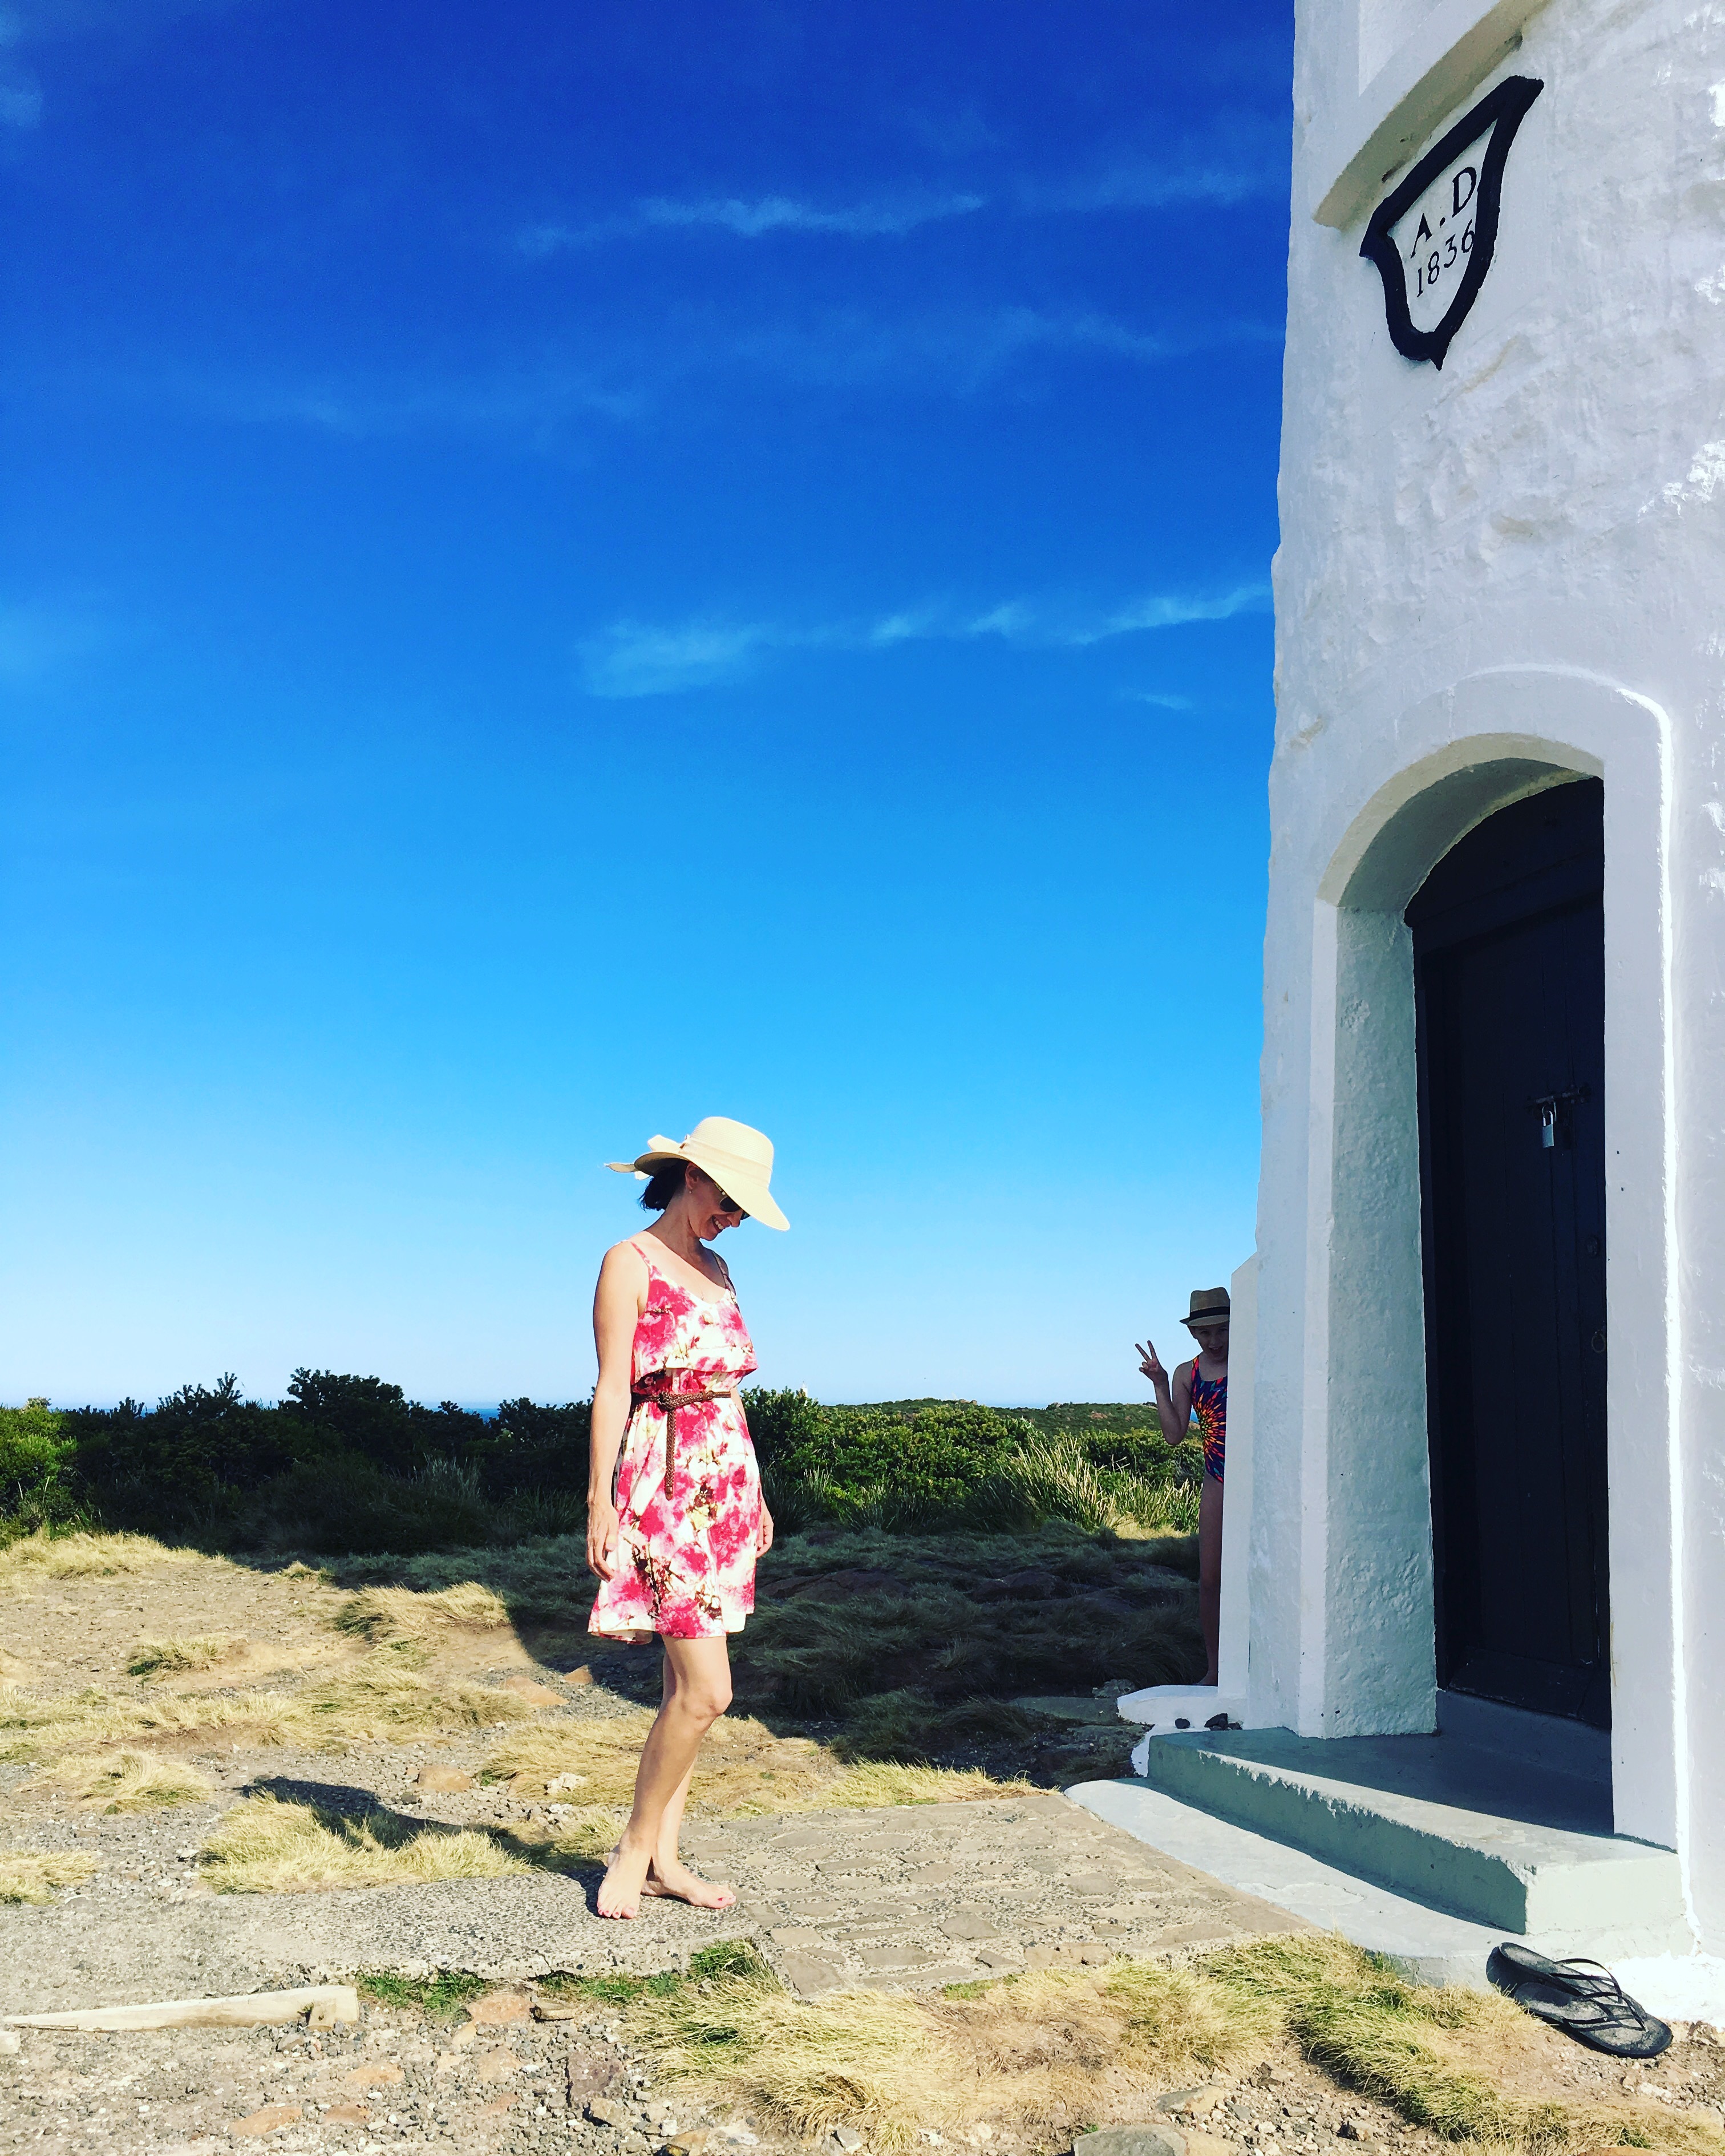
Vintage Vogue 8974

Vintage Vogue 8974

As the front slopes down to the back, it isn’t just a matter of running in the sides to pull it in and make it fit (no I don’t muslin much… I like to think of myself as an eternal optimist and sew with that attitude). As I was mid-make, taking it in at the sides was my only option and I pulled more in from the back on an angle to make it work. This in turn messed up my lovely neat-as-a-pin facings which was a little disappointing. Yes, very dodgy but only you, me and few other thousand readers know this – and I don’t wear my dresses inside out. So my secret is safe 🙂

I had to take at least 2 inches off the straps. For some reason you attach the straps to the back bodice and then adjust them at the front. The front bodice is quite fiddly and I think it would be simpler to adjust the straps at the back instead if I make this again.

A pretty cross-over back strap detail.

A pretty cross-over back strap detail. The rarely seen tatto- you’re welcome.

I took 3 inches off the length (I am 5 foot 4) and turned the hem up with some blue bias tape from the stash. I hand stitched the hem, I love the finish of a handsewn hem.

FINAL THOUGHTS

Love this design. It feels modern and feminine without being fussy. I’m extremely tempted to make it again… I just need to figure out how to best deal with the gaping at the upper bodice and underarms. Or maybe it’s meant for someone with more curves than me!

It reminds me a lot of the Sewaholic Lonsdale which perhaps I should also revisit.

If you have any suggestions on fitting or another dress pattern I should try along these lines… I’d love to hear it!

Pattern: Vogue 8974
Fabric: Linen from The Fabric Store, Brisbane (purchased a couple of years ago). Blue, khaki, white and splogdes of yellow, I adore this colour combination.
Also see: See Carmen Sew | The Fold Line | Silver Cat Tea Party


Photobombed by a pelican

Photobombed by a pelican in my lunchbreak.

It’s quite odd posting my projects out of order. Seeing my hair change lengths and colours. It’s much healthier now than a year or so ago.

This time last year, I cut off my nails as they kept snapping and my hair was thinning and breaking for no apparent reason… actually I think it was mainly two things… too much stress, exhaustion and no rest…  It was the day I put my hair up in the ponytail and a large amount of it simply snapped off around the hairband, I realised something had to give… I changed some things and I feel much better a year on. So all’s well that ends well.

The Unblogged: Waffle Pattern Vanilla and Cali Faye Collections Rumi Top

So yet more tops, this time some knits.

While I was feeling out-of-sorts this year, I resorted to sewing lots of simple tops to sate my craving to sew – which it really didn’t. Although I do have a collection of tops to wear so all is not lost. In hindsight I should have sewn more complicated garments, I find while I love simple garments, I find sewing challenging garments more relaxing – which is what I needed in 2016. However these little garments were about all I could fit in. Such is life!

Vanilla Top, Waffle Patterns

First up the Waffle Pattern Vanilla top.

I hate these photos so probably why it’s been hovering in the Neverland of Unblogged.

Vanilla Top, Waffle Patterns

Vanilla Top, Waffle Patterns

One thing I really don’t like about this top is how the perfectly neat neckline hits the stripes at an odd angle (due to the slightly-off-beat stripe directions with the drape) and looks messy. It really annoys my eyeballs like dust on a dry windy afternoon! I’ve often worn a scarf with it for that reason because it visually drives me bonkers. But I can be precious.


I do find the sleeves an odd length but I also think in a different weight fabric they wouldn’t bother me so much.

Waffle Patterns, Vanilla Top

If you like stripes doing odd things, you will love this

So another easy-to-wear-with-jeans garment as hence got a lot of wear throughout the colder months as a ‘house’ jumper with jeans.

Yes, you may recognise the fabric from my first Penny Raglan. I managed to squeeze a Penny Raglan and this top out of 2m of this fabric.

I think this fabric choice is too heavy for this design BUT very easy to make and rather fun to wear. My eldest daughter has declared that this will be her top when I tired of it.

This is the second Waffle Patterns pattern I have made and I must say I do enjoy them. Nicely presented, comprehensive but not excessive instructions well illustrated with diagrams, and an A0 copy shop sheet printing option… and you can turn off layers to print as many or as few sizes as you like. I’d love to try some of her jacket patterns, the details are thoughtful and they have intrigued me for some time.

Pattern: Waffle Patterns, Vanilla top
Size: Size 34
Fabric: Make It Fabrics, Brisbane

RUMI TOP by Cali Faye Collections

Next up a Cali Faye Collection Rumi Top which was released a few months ago.

I volunteered to pattern test for this and found the process really interesting. I’ve always quite liked the design aesthetic of this designer, simple and modern. Although the pattern price point is quite high.

Rumi Top, Cali Faye Designs

Rumi Top, Cali Faye Designs

Cali Faye Collections have a closed facebook group for their testers. Throughout testing period, testers post their versions, comment about the design, instructions and so on. The pattern did changed several times in response to feedback from testers and it was interesting seeing different fabrics being used. I thought it was a thorough, open and interesting community sewing process.

Rumi Top - Side view

Rumi Top – Side view

I sewed up the final version which you can see here. It’s a large over-sized boxy top with fitted sleeves. I’ve worn it a lot, it is easy to wear and great with skinny jeans or fitted pants. It is a very simple design and reminds me of my Japanese pattern book top patterns.

The neckline is finished with woven bias tape. I haven’t finished a knit neckline in this manner before and would be curious how that works for a stretchier knit than this. With this rather stable cotton terry knit, it did provide a nice neat, flat finish.

I would advise sewing with a knit with nice drape. Anything too heavy and you may find yourself wearing a tent!

Rumi Top, Cali Faye Designs. Back view

Rumi Top, Cali Faye Designs. Back view

Pattern: Cali Faye Collections Rumi Top
Size: XS
Fabric: Cotton Terry Knit, Spotlight Australia
Note: I received this pattern as part of the testing process, all opinions my own.

And I think that’s all the Unblogged tops done now. Hooray!