
Learning to make shirts has been one of my favourite sewing journeys. Why?

- They are a practical garment that you can wear all year round
- They are perfect for layering, perfect under jackets and jumpers, fantastic worn open over dresses and camisoles
- They are the perfect step-by-step project that you can break up into 15 minute slots. I Love sewing a shirt over many, many sessions. I
- and finally… the details… ah the details! The seemingly endless array of collar styles, sleeves, cuffs, plackets and more. They are a great canvas for your imagination – but still result in a wearable, practical outcome.

I’ve seen a lot of mixed solid and print garments lately – it’s a perfect way to use up those odd lengths of fabric that we all hang onto… because it’s too much to throw away… but too little to make another garment. It’s also a brilliant way to combine sew up those remnant pieces we can’t seem to resist in the local fabric store!
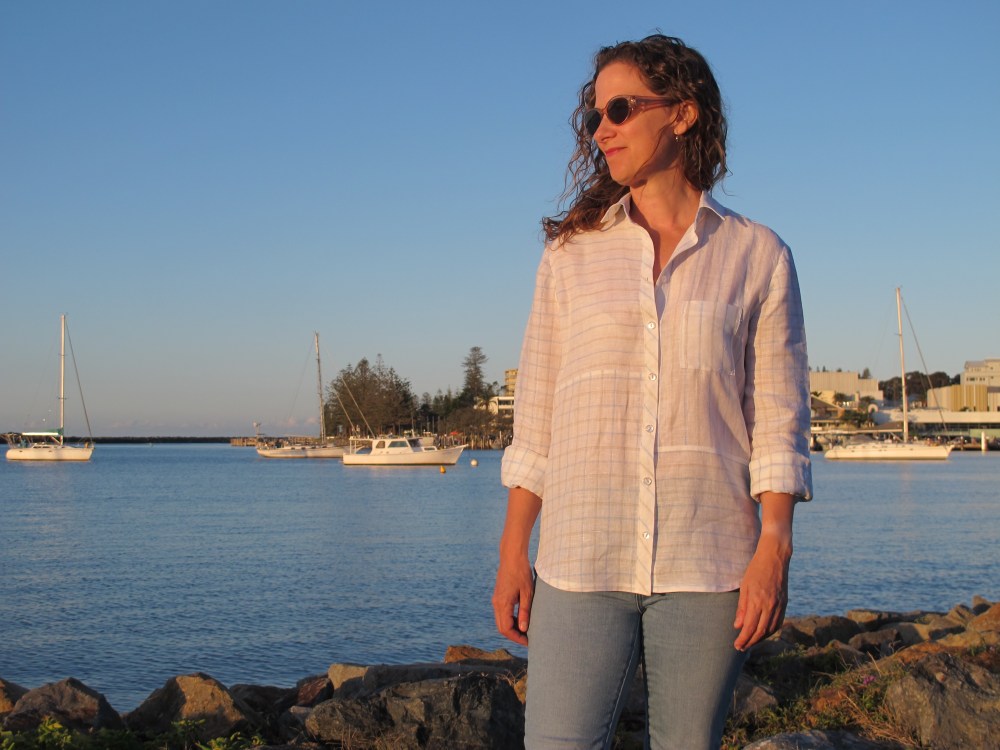
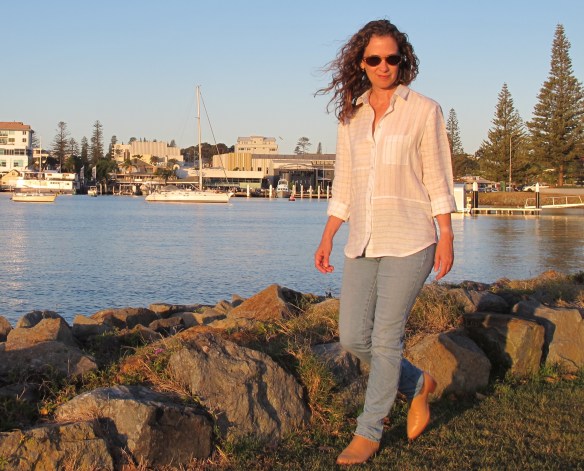
I’ve pulled several of those smaller linen pieces out of my stash but never settled on a combination I thought I’d wear. Then I spied a lovely stripe and matching check in the De Linum range and thought they would make a perfect pair!
I wanted the shirt to be more subtle, but to play with stripes and break up the larger front panels. These fabrics presented the perfect opportunity.
Pattern: Grainline Archer Button-up
After my usual bout of extreme procrastination, I settled on the Grainline Archer Button-up as my pattern choice, one of the classic shirt patterns available online. I’ve also made this twice before – here and here.
This is a great pattern if you haven’t sewn a collar shirt before – or want to brush up on your shirtmaking skills. Grainline has an extensive number of free video available online, to walk you through the process, step by step. You can find them all online here.

French Seams
This linen is very fine and well suited to French seams. This entire shirt is French seamed, the inside is immaculate (if I don’t say so myself!). The French seam finish isn’t part of the Archer instructions but a very easy seam finishing technique. There’s information aplenty out there about how to make French seams, including this post by Grainline Studios, so I don’t need to re-invent the wheel – or seam allownace as it may be – however here’s a little technique that I find really useful.
The Archer has a 5/8 inch seam allowance. To French seam this pattern…
- Sew the first seam, wrong sides together, with a 3/8in seam.
- Trim the seam to a very scant 1/4in – or about a 3/16in if you want to be very precise.
- Press the seam open. This can be tricky when you have a hot, steaming iron and a tiny seam allowance. I’ve found if I use a seam presser tool, I achieve a much neater French seam. The Clover Finger Presser (see below) keeps your fingers off the fabric, away from the iron’s steam and helps gentle open the seam up while creating a nice gentle finger press.
This technique works even better if you have been pressing fabric as the gentler heat of the board is very useful. Once the seam is open, I give it a light press with the iron and then use my clapper to set the seam open. - Then turn the fabrics right sides together. As you have pressed the first seam open, you will find it much easier to get a crisp, neat edge. Press.
- Then sew a 1/4in seam, encasing the raw edges within.

Bias Tape Hem
The Archer calls for a traditional double-turned 1/4in hem.
I did some research and opted for a bias tape hem due to the curved edge of this shirt pattern. This sewalong for the Closet Core Kalle Shirt/tunic is very useful if you haven’t sewn this hem finish before.
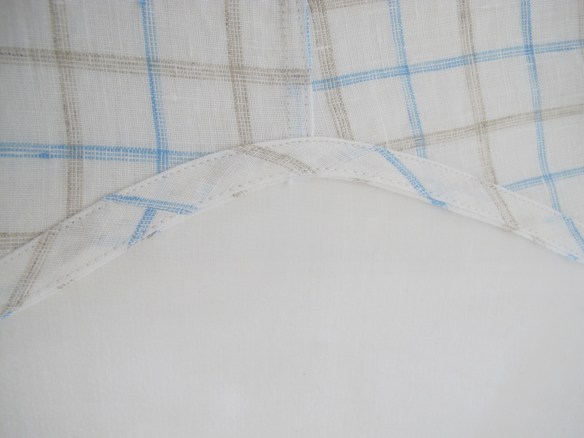
I cut 1 inch bias strips from leftover fabric, joined them end-to-end to form a long strip and then used my Simplicity Bias Tape maker to create folded bias strips. This handy machine came back into production a couple of years ago and is a fantastic tool for the sewing room. I picked mine up on special and glad I did. It’s worth every penny.
I’m really delighted with this hem finish. It looks immaculate on the inside and outside – and the hemline sits perfectly flat. Well worth the little bit of extra effort.
Small details
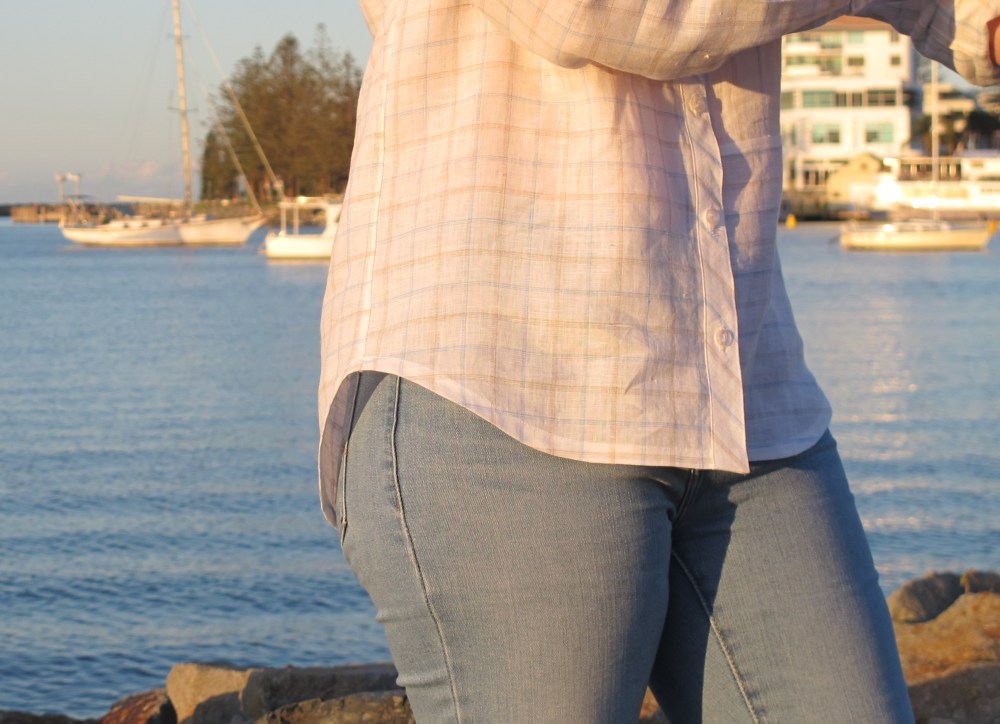
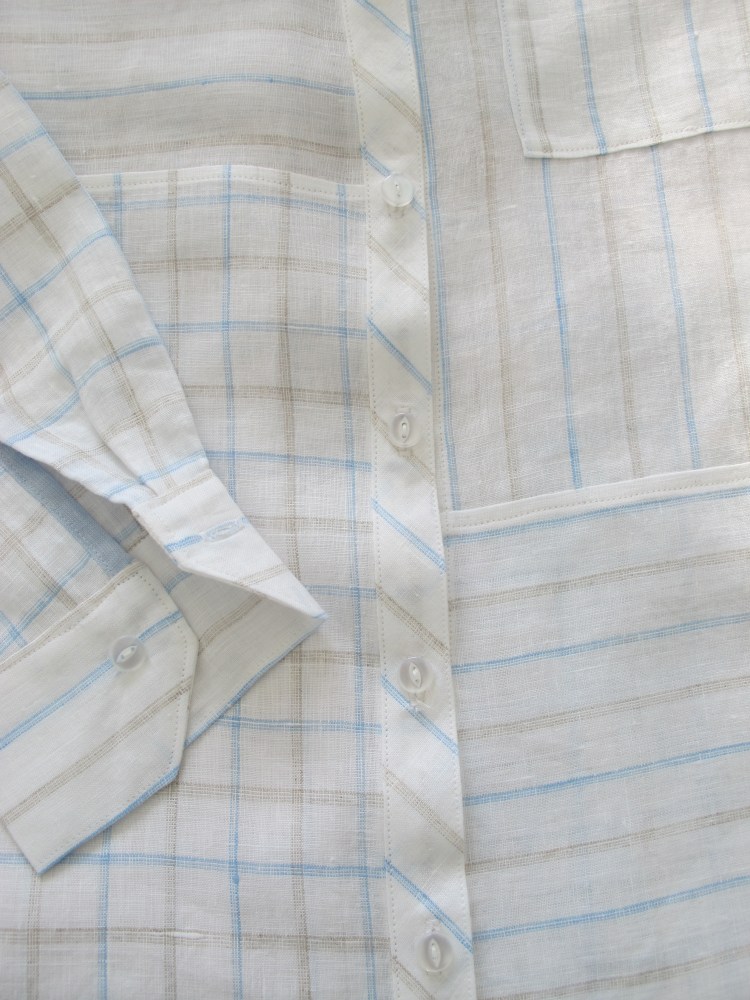
I was going to use just the checked and striped fabrics … but stumbled across a small sample of another De Linum linen in my stash which seemed like a perfect match, so added two very small touches, contrasting sleeve plackets and inner collar stand.


I also cut the button band on the bias. The patch pocket appears to the pattern matched… and it is but I’ve offset it so the contrasting colours are matched. I decided on pocket placement while wearing the finished shirt, I attached it twice before I was happy.
Minor pattern changes
I didn’t want to break the front panels at the bust point or under the potential pocket I might add. So I sliced the left front panel approximately 8 inches from the hemline and added 5/8 seam allowance to the upper and lower piece. I split the right front panel approximately 5 inches above this point and also added 5/8in seam allowance to these pieces.
I ran the stripes in different directions for interest and also used a check fabric piece for the larger lower portion. The yoke, collar and cuffs uses the stripe fabric. The sleeves and back are checked.

I absolutely loved making this. Considering how to use the fabric, sewing a step or two a day, researching how to better finish the garment – it was hugely satisfying. That’s the joy of sewing, not just the end product but also the process.
Details
Fabrics: Earth & Sky Check, Earth & Sky Stripe, Icy Baby Blue
Pattern: Archer Button-up by Grainline Studios, available in 0-18 and 14-32 size ranges.
Note: there is also a yellow/tan combination at De Linum: try Earth & Sunshine Stripe and Creamy Lemon Oatmeal check
Next up
With my leftover pieces, I whipped up some handkerchiefs with tiny mitred corners.
Nicks Dress by Core Closet… unless I change my mind of course!
Life…
I’ve been very absent in the past two years. Life has been extraordinarily hectic – more on that later!

French seams are great for semi-transparent and for fraying fabric. They are my go to for rayon. But they don’t work for curved seams, especially if you need to snip them. I’m wondering how you finished the armholes?
I’m a G sewing cup, and have really big wings on my side bust darts, which need to be trimmed to avoid side seam distortion. Can’t do french seam on them, so trim, fold in edge and topstitch for faux french seam. But although I’ve tried it, it doesn’t really work on curving seams.
To be honest I’d never tried them on armhole seams because I thought they would not work with the curve… but I knew some people had successful French seamed this particular pattern so I thought I’d give it a go. I trimmed it to a very scant 3/16in, maybe slightly less. I think that negated the need to clip the seam allowance. This linen is very fine and I think that’s perhaps why it worked. It was a happy surprise when it work so well.
No bust darts on this pattern to accommodate, I think those extra layers, along with a tight curve might not have the same degree of success.
Beautiful shirt with stunning fabric placement and perfect stitching.
I have the Archer pattern and yours is giving me lots of inspiration.
Thank you for sharing.
It’s such a timeless pattern. I’d highly recommend the Grainline sew along videos. I used her blog posts the first time I made this pattern, you learn a lot. I loved the burrito yoke method.
I still use the Four Square Corners collar method though! So much easier.
Love the way you have used the fabric and now have a beautiful shirt to wear. Thank you for the reminders about the sewalong.
Thank you! I do prefer the older blog posts, I’m more of a reader than a listener. That said, any sewalong posts for a pattern often help you learn new techniques or the intention behind design elements. I always learn something!
Thank you for showing us all the thought-through details of your sewing process. For French seams, I would press open the SA too and your idea with the finger presser is fabulous. I love your neat hem with the bias, too!
Thank you! Bias tape hem finish is soooo worth the little bit of extra time to prepare. It gives a flawless finish.
Such a beautiful project, so fresh and clean
Thank you! It’s a happy day when the shirt you imagined actually turns out the way you hoped 🙂
Really beautifully made shirt! I hope to start on a shirt making odyssey soon, and this is inspiring. Also, it’s really nice to see you back here!
Thank you 🙏🏻 it’s nice to be back. I really enjoy sewing shirts, it’s meditative, lots of small precise steps, thoughtful use of fabric, a great project to take your time over.
Hi, I’m looking to contact the owner of this site, Lizzy? I’d like to know if you would like to business together. Partner in sewing. We are an indie pattern company selling our digital patterns in a sewing library via a sales funnel. We are looking for partners in many different capacities.. even if it’s just to share links or interview each other. We do have a great affiliate opportunity in exchange for putting our banner, link to our video commercial on your site.. 75% commission. Anyway, regardless, really would like to connect, if you’d like to as well. Margie Vaudreuil, Owner Sewing Pattern Secrets LLC Boston, MA
Sorry, contact info: support@sewingpatternsecrets.com , 1-833-SEW-EASY, or sewingpatternsecrets.com/vsl (commercial) and we are on Facebook and Insta. Our blog is http://www.thesewingbuzz.com
I am just cutting out my first Archer, size 14 button up. I am surprised that the layout in the pattern book does not even mention nap, which could be an issue with florals or other patterns. And I find that I can’t fit the yoke pattern piece into the armhole of piece 1. Glad I bought extra material !
That’s strange about the yoke piece, I’ve made three sleeved archer shirts with no issue. I agree about not mentioning the nap on the pattern layout. It does mention in the ‘suggested fabrics’ section it does say “Extra fabric may be needed to match plaids, stripes, or one-way design prints”. Happy sewing.